Avoiding Common Mistakes Made At RV Parks & Campgrounds
Everyone has to start somewhere, and while hooking up your RV for the first time at an RV park or campground might seem intimidating, remember, we’ve all been there before.
Making mistakes is just a part of camping, and you might have to learn a few things by trial and error.
Related Product: See how level your RV is using an App on your phone with the LevelMatePro Wireless RV Leveling System (click to view on Amazon)
There’s some stuff we wish we knew before we went to our first RV park, and that’s what this article is about.
These are just a few things I’ve noticed from other RVers and done myself in my years of full-time RVing and setting up at many RV parks and campgrounds.
Hopefully having these tips in mind while you set up will help save you some time and frustration once you reach your camping destination.
7 Ways To Set Up Your RV Like A Pro
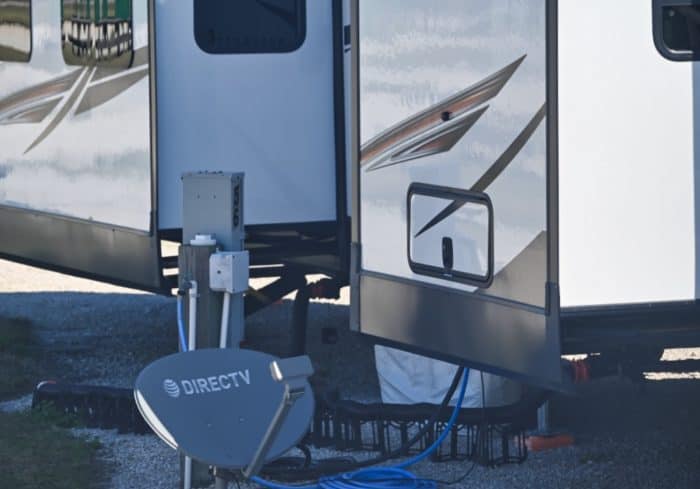
1. Make Sure There’s Room for Your Slide Outs
Even just 20 years ago many campers didn’t have slide outs. Most RV parks and campgrounds were built for narrow motorhomes and trailers that didn’t take up much space from side to side.
Today, most RVs pull into a spot and spread out to a much wider size. Some campers even have mega slide outs on both sides making them almost double the starting width.
Slide outs are here to stay and RV parks and campgrounds have tried to adjust but there are still a few that haven’t been able to make the necessary changes.
Always measure the slide out distance when you first pull or back into your campsite.
If there’s a tree nearby make sure it won’t be in the way from the side or from above.
We’ve opened our travel trailer’s slide out into several branches at some of the smaller RV parks we’ve stayed at.
See Also: Are RV Slide Out Supports Necessary?
Keep an eye on the RVs in the sites around you as well.
Some RV parks like to pack in campers like sardines and there have been times when our slide out was just inches from our neighbors slide out.
The easiest way to quickly measure your RV’s slide out extended length is to use your arm.
Compare your arm length with each slide out, chances are it’s close enough to use as a good measuring system.
When you first pull into a site, stand with your back against the slide out and put out your arm to get a general idea of where it’s going to end.
It’s a lot easier to move a camper before it’s been almost completely set up with the wheel chocks in place and the stabilizer jacks down.
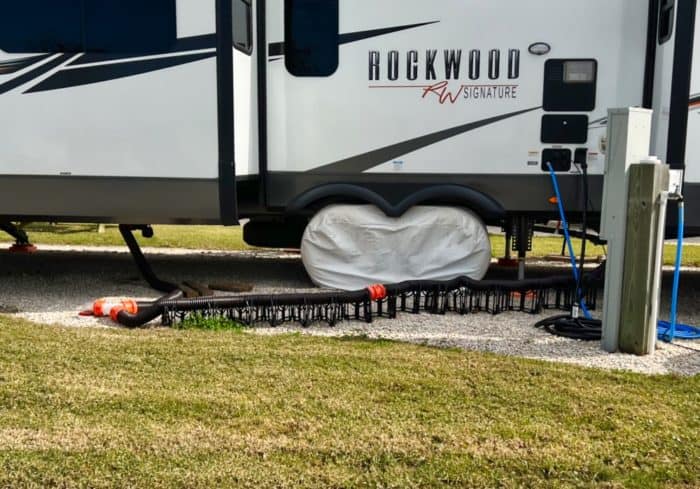
2. See if All of The Hookups Will Reach
Before you even put down the wheel chocks and unhitch another thing to check for is the location of all of the hookups.
The usual culprit is electrical. Start by pulling out the RV electric cord and make sure it can make it to the power pedestal.
If you have a surge protector, which I’ll talk more about in tip number 3, now is also a good time to plug that in to make sure the outlet you need to use is safe.
Water and sewer hookups are usually a little more forgiving since most RVers have longer water and sewer hoses.
See Also: Best RV Water Hose For Drinking Water & Best RV Sewer Hose Kits Reviewed & Rated
Be careful though, the connections to each hookup might be further than you think.
We’ve spent many stressful moments trying to figure out where the sewer hookup was after we had already set up our entire travel trailer.
Sometimes the sewer cap is covered by dirt or a rock and you should find it before you get everything else ready.
It’s especially important to make sure the sewer hose will reach if your RV has the holding tank hookup in the middle instead of the back.
Many RV parks have the sewer as far away as possible and you may end up needing to back up a little bit more to reach.
It goes both ways though, newer RV parks seem to be putting the sewer connection more in the middle to accommodate newer RVs and if you have the holding tank outlet on the back you need to make sure it will reach.
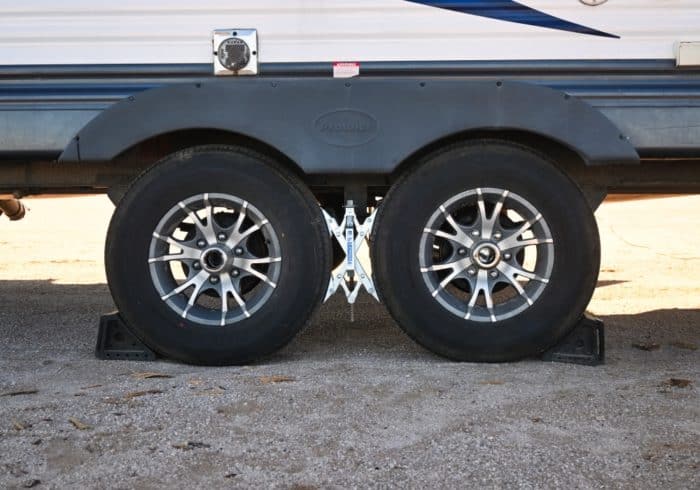
3. Get the Wheel Chocks Out Fast
Once you’ve figured out where your RV needs to be and you’re level from side to side, the wheel chocks should be put down right away.
They’re especially important to have secured before unhitching a travel trailer or 5th-wheel.
The front leveler jacks on either kind of camp trailer should not be the only thing keeping your camper from rolling.
They are not meant to take sideways pressure and they can break if they are being pushed or pulled by the RV.
See Also: Best RV Wheel Chocks (Plastic, Rubber, Metal, X-Chock)
I’ve seen a tongue jack on another camper’s travel trailer break off from the frame and fold forward because the trailer was pushing it.
They weren’t using wheel chocks and if they had been, the jack wouldn’t have broken.
You’ve maybe also seen tongue jacks that look slightly bent. This is from the same thing, people not securing the wheel chocks before unhitching.
Motorhomes are a little different and wheel chocks are more of a safety measure but they’re an absolute must have for travel trailers and 5th-wheels.
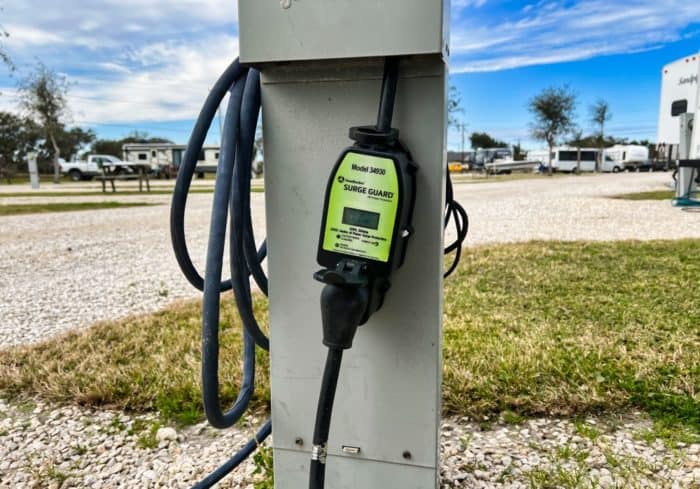
4. Use A Surge Guard (Surge Protector)
Power surges can happen at any time, and circuit breakers can’t stop them. If your RV is plugged in when one happens the wiring inside could get completely fried.
The fix could end up costing a lot and in some cases, you might even need to get a new camper.
Experienced campers use RV surge guards and I strongly recommend getting one.
There are different kinds of surge protectors.
Some protect from higher surges and have built in electrical monitoring systems (EMS) that will test the power source to make sure it’s safe before you plug in.
Related: Best RV Surge Protector & EMS For 30 Amp & 50 Amp
It might seem like overkill, but a high quality RV surge guard with an EMS can help out even when you’re setting up your RV.
In tip number 2 I mentioned using a surge protector to test the power pedestal before setting everything up.
The reason I recommend doing this right from the get-go is because we’ve had issues with unsafe RV park power before.
We weren’t totally unhitched and set up before connecting the power but we had gotten pretty far in the process when I decided to plug the RV into electricity so we could put down the stabilizer jacks.
I plugged in our Southwire 30A Surge Guard (click to view on Amazon) that runs a 10 second diagnostic test before allowing power through it.
The caution light started flashing and an error code for unsafe power was on the LED screen. It didn’t surprise me since the RV park we were at was pretty old and run down.
We told management and they directed us to another site that was deemed safe by our surge guard.
As far as we could tell nothing was done to fix the issue and who knows what could’ve happened if we had started drawing power from the faulty power pedestal.
While problems with RV park power are rare and power surges don’t happen every day, you never know.
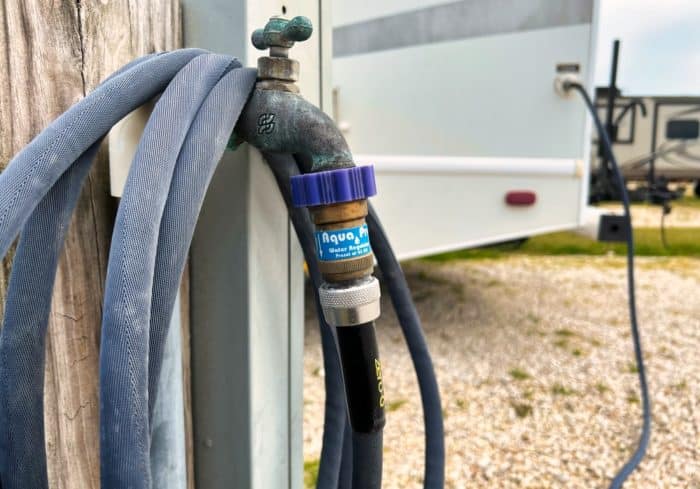
5. Use a Water Pressure Regulator & Water Filter
If you’ve ever looked at the water pipes in an RV you’ve probably noticed that they’re pretty flimsy looking.
Most campers have PEX tubing for the freshwater lines. PEX tubing is used because it’s inexpensive and fast to install.
The PEX tubing itself isn’t necessarily what fails first if the water pressure from the water connection is too high.
It’s normally the connections or the faucets that start to leak and eventually break. The water hose can also be affected by constant high water pressure.
You don’t want any kind of water leaks anywhere in your camper so keeping the plumbing in good condition should be a priority.
Most RV water pumps will output 40 to 60 psi of pressure. That’s a good pressure guide to follow for your RV park water hookup as well.
Inline water pressure regulators like this one by Camco (click to view on Amazon) are super simple to use and very effective.
Sine RV water hookups are normally just water spigots with twist valves there’s really no way to adjust the water pressure properly.
With a water pressure regulator, you will know that your RV plumbing is safe and all of the faucets will be able to work normally since the water is at the pressure that they’re made for.
It also takes a lot of pressure off of the freshwater hose.
Water filters are also a good idea to have but they aren’t as important as the regulator.
You can read more about them in this article here.
6. Get a Sewer Hose Stand
Don’t be like us. It took visiting at least 4 RV parks before we realized that a sewer hose stand wasn’t as optional as we thought.
Many RV parks have a rule that the sewer hose must be off the ground, and they can be sticklers about it too.
That’s how the situation in the picture below happened.
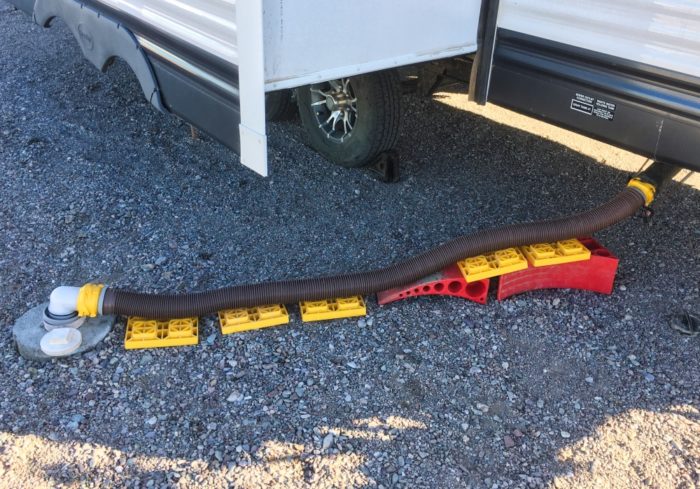
We only stayed a few days but the RV park manager was strict about the rules. It was our fault for not having an RV sewer hose stand in the first place.
We went and got the Camco Sidewinder Stand (click to see review) as soon as we left that campground.
I actually use the stand for more than just RV parks. Many dump stations have a curb or something that the sewer hose needs to go up and over.
I use the stand to keep the hose level which makes dumping the camper much faster.
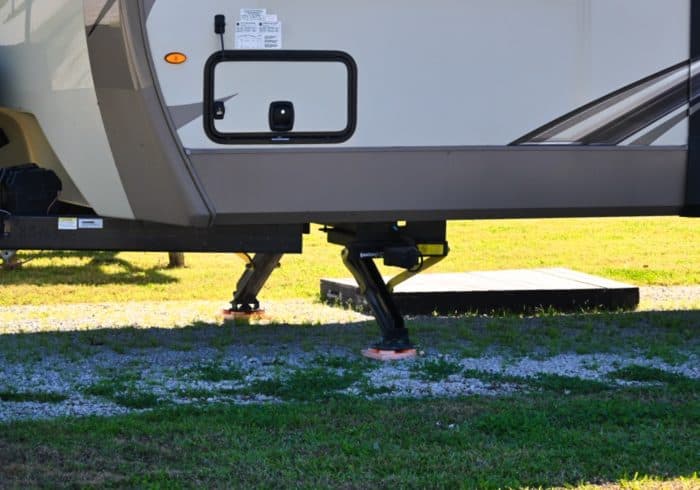
7. Don’t Overload The Stabilizer Jacks & Use Blocks
Finally, the stabilizer jacks are something that is often misused by even experienced RVers.
There are two kinds of jacks on campers; leveler and stabilizer.
Leveler jacks are what take the weight. It’s the tongue jack on a travel trailer, the two front jacks on a 5th-wheel, and what’s often found on motorhomes.
Stabilizer jacks are the other jacks that extend from the sides of campers.
They are in no way meant to lift an RV, they are there to help stop side to side motion.
Related: Best RV Stabilizers For RV, 5th-Wheel & Travel Trailer
A good way to make sure you don’t put them down too far is to extend them until they are on the RV blocks (or ground) and then add one more crank.
The camper shouldn’t lift at all and the blocks should be firmly in place and unmovable.
I say use RV blocks (click to view on Amazon) as well because they are a good way to tell how far the stabilizers need to go down and they also help protect the ground underneath them so you don’t leave any marks.
It’s recommended to put the stabilizer jacks down before you put out the slide outs to help keep the RV level from side to side and to stop the camper from shaking while the slide out motor is running.
One last thing about RV stabilizers and blocks.
Many campers like to use at least 4 blocks to help bring the ground to the stabilizer jack.
It makes the stabilizers more effective and also helps save time since you don’t have to put them down as far.
It’s not something you have to do but it will make you look more like a pro when setting up in an RV park or campground.
Conclusion
While it’s not easy to predict every scenario an RVer might be faced with at an RV park or campground these are just a few things you can do to try and make setting up a little easier.
If you’re just starting out making a list you can follow every time you pull into a new campsite is a great way to establish a routine.
The more you camp, the more you will learn and the faster you will get at setting up or packing up your RV.
See Also: What Do I Need To Use Hookups At An RV Park Or Campground?
I hope these tips have helped you feel more confident in your RVing abilities. If you get lost there are usually a few kind campers around who can answer questions and give you a few pointers.
Enjoy your travels.
Have any questions about setting up at RV parks and how to avoid common beginner mistakes? Leave a comment below.


I’m glad you elaborated on RV campgrounds and how to prepare for a long road trip. My wife and I decided to buy an RV last week, and since we’re beginners in the RV world, I believe we’d use your camping trips. Thank you for the information on how to be ready to face different RV campground issues. https://www.jrretreatflorida.com
My friends and I are planning to go on camping next weekend, but since it’s our first time, we haven’t decided on the site for our trip yet. Thank you for informing us that while most RV parks are built for narrow motorhomes, there are still some that have adjusted to accommodate wider vehicles. I’ll have to check what size of RVs they allow first before we decide on the RV resort we’ll be going to for our trip. https://www.hiddencreekrv.com/
When you go to a campsite is there an office or something where you check in? I am renting a drivable 25 ft. motorhome and have never been RVing before. Pretty nervous and excited at the same time. I have been online reading many tips for beginner RVers. So far nothing about getting to a site and what to do. Thanks for the help.
Hi Gary,
Places like RV parks usually have a front office you check in at to get the site number and info. There’s normally a reserved check-in parking area you can park your RV in so you can walk into the office.
Campgrounds will normally have an info sign near the entrance with a form you fill out and a place to pay the fee. In campgrounds like that, you find the site you want first, then fill out the form and pay.
If you’ve reserved a site and prepaid you can usually go directly to it. You normally don’t need to check-in because your name and stay dates should already be posted at the campsite.
Next weekend, my friends and I want to go camping, but because it will be our first time, we haven’t chosen a location yet. We appreciate you notifying us that while most RV parks are designed to handle small motorhomes, some have made modifications to allow broader cars. Before choosing the RV resort where we’ll stay on our trip, I’ll have to find out what size RVs are permitted there first.
I like your detailed insights into RV campgrounds and tips for preparing for a long road trip. My wife and I just purchased an RV last week, and being newcomers to the RV scene, I think we could benefit from your camping advice. Thanks for sharing valuable information on how to be prepared for potential challenges at RV campgrounds. http://fireflyhillskentucky.com/