
Stopping Moisture & Mold Under An RV Mattress
Mold is something every kind of RVer deals with.
It doesn’t matter if you’re in a motorhome, 5th-wheel, travel trailer, van, or truck camper the risk for mold growth is always there.
It’s an even bigger issue if you live in your camper full-time.
Related Product: Keep the clothes in RV closets dry and mold free using Eva-Dry Rechargable Mini Dehumidifers (click to view on Amazon)
The first thing to get moldy is usually the mattress.
Because of the temperature difference between the top of the mattress where you’re sleeping and under the mattress, there is usually a lot of moisture collecting underneath.
Most trailers and motorhomes have outside storage that runs underneath the RV bed box as well which only increases the temperature difference and moisture collection.
In our Class C motorhome, the entire bed sits above a huge storage compartment that can be accessed from the outside.
You can really feel the cold coming in from underneath and on especially cold nights the mattress is freezing.
From what we know about mold growth inside RVs and the problems with moisture under the mattress we knew a mattress underlay was going to be a necessary addition to our camper.
I’ve written about how to prevent mold growth under an RV mattress before (click to see article) and have recommended the Den-Dry Mattress Underlay for helping to prevent mold growth.
Before getting an underlay, I used a dehumidifier and cans to air out underneath the mattress in our travel trailer but now that we live full-time in a small Class C I wanted an easier more permanent solution.
See Also: RV Condensation And 14 Ways To Prevent Mold In Your Trailer
So taking my own recommendation I got the Den-Dry mattress underlay and installed it under the queen size mattress.
Here is my full review of the Den-Dry Mattress Underlay and my tips for how to prepare and install it.
Den-Dry Mattress Underlay
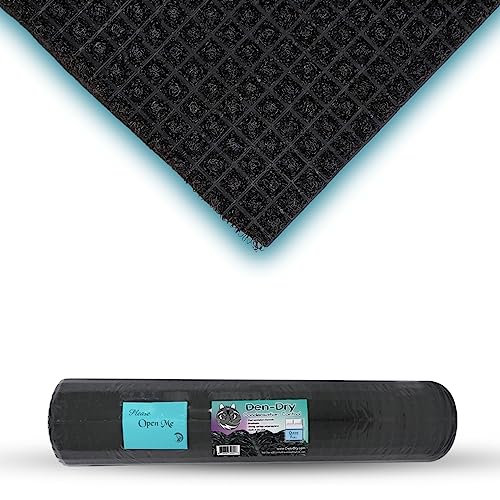
The Den-Dry mattress underlay is basically a large mat with hard spun polyethylene on one side and a soft felt material on the other.
Its purpose is to lift the mattress in your camper to allow air underneath so it will not only dry quicker but it will also prevent most moisture from collecting in the first place.
There are three size options: king, queen, and twin.
Each size comes in one long piece and if you get the king or queen size you will need to cut the underlay in half to fit your specific mattress.
See Also: Best Small RV Dehumidifiers That Help Prevent Mold
If you have a full size mattress I recommend getting the queen size since the twin won’t be big enough.
I’ll talk more about it below but it’s really easy to cut the mattress underlay to size.
So even if you accidentally get one that’s too big or you have a short queen in your camper you will be able to cut it down to a custom size with regular scissors.
Den-Dry Mattress Underlay Review
Now for my review of the Den-Dry mattress underlay (click to view on Amazon) after installing it and using it every day in our Class C motorhome for a month.
In our RV we have a standard queen size full mattress we got from Ikea. It’s a full foam mattress with no springs and it’s very heavy.
I figure if the Den-Dry mattress underlay can hold up our thick foam Ikea mattress it can handle just about anything.

When we got it it was rolled up and sealed in plastic packaging.
The instructions that come with it are very straightforward and easy to follow.
The twin size doesn’t need to be cut but anything bigger will need to be folded in half and cut to size.

For the queen size mattress in our camper, we cut the underlay in half.

I found the easiest way to do this was to roll out the entire underlay, fold it in half, and cut along the fold.

No measuring was required using this method and it was easy to cut with regular scissors.
If your RV has a short queen you will need to cut a little bit more off of each side after cutting it in half.
Once I had it cut in half it was just a matter of getting it underneath the mattress in our RV.

According to the instructions, the hard spun polyethylene side goes down and the soft felt size goes against the mattress.

The mattress in our motorhome is in the corner and it was a little difficult to get the underlay underneath it just right.
After the first try, we saw that the underlay had bunched up in the corner.
We tried to get it to lay flat a couple of times we realized the best way to get it to stay would be to use a screw in each corner.
It was easy to get it perfect after that and it actually holds the mattress in place better now.
We’ve been using it for about a month now and I’ve checked it a few times to see if any moisture has collected underneath, especially after rain.
So far so good. The Den-Dry mattress underlay has been doing its job.
See Also: How Do I Stop My Clothes From Getting Damp In An RV Closet?
We used the same mattress in our old travel trailer without an underlay and there is a difference.
We discovered moisture underneath a couple of times and had to set it up on cans and run a dehumidifier all day to get it dry again.
Now we don’t have to go through all that and I’m confident that the underlay is going to prevent any mold from growing underneath our RV mattress.
Since mold can ruin both the mattress and all of the wood in a camper the Den-Dry mattress underlay (click to view on Amazon) is absolutely worth it.
6 Month Update
We’ve now been using the Den-Dry mattress underlay in our small Class C RV for 6 months and I wanted to give an update on how it’s working.
For the past 4 months we’ve been camping along the Texas coast on beaches and staying in beach town RV parks.
The humidity here has been higher than anything we’ve ever camped in.
We’ve had to run the RV air conditioner a lot to try and keep the humidity level below 50% during the day but at night levels can get as high as 80% inside our RV.
I recently inspected underneath our queen size mattress in the corner of the RV to see if any mold has been growing.
I’m happy to report back that there is no sign of mold anywhere, not even on the wood underneath the Den-Dry mattress underlay.
See Also: 6 Fun RV Comforters & Bedspreads For The Camper Or Home
Everything has stayed dry and it seems like the underlay has helped the air underneath the mattress dry out when we run the RV AC and our mini dehumidifier.
This climate has really put our RV to the test as far as mold growth goes.
We both work on the road and with two people spending so much time in a small motorhome humidity levels can get really high.
So far running the RV AC has been the most effective way to get the humidity below 50% and the mini dehumidifier helps maintain that.
I think without the Den-Dry mattress underlay, mold growth underneath the mattress could have quickly become an issue.
Have any questions about the Den-Dry Mattress Underlay or how to prevent mold in your RV? Leave a comment below.
Hi Jenni,
How easy is it to install? I have a camper with the over the bunk bed. It is not easy to remove the queensize mattress and there is only about two feet clearance from the mattress to the ceiling.
Hi Alison,
I think it’s possible with a little creativity and help from another person, but being able to remove the mattress does make the installation a lot easier.
You could cut the underlay in half so it’s in two pieces to make it easier to work with. It’s easy to cut with scissors and it’s fine if it’s in a few pieces.