RV Toilet Bowl Basics
RV toilets not holding water is a very common issue that we’ve experienced in our RV more often than we’d like.
The small amount of water in the toilet bowl creates a seal between the toilet and the black tank.
Without that water seal, odors from the black tank will start to escape through the toilet and the entire RV will start to smell. So you want to get that fixed as quickly as possible.
Related Product: Make sure the RV toilet never stops holding water with Thetford RV Toilet Seal Lube & Conditioner (click to view on Amazon)
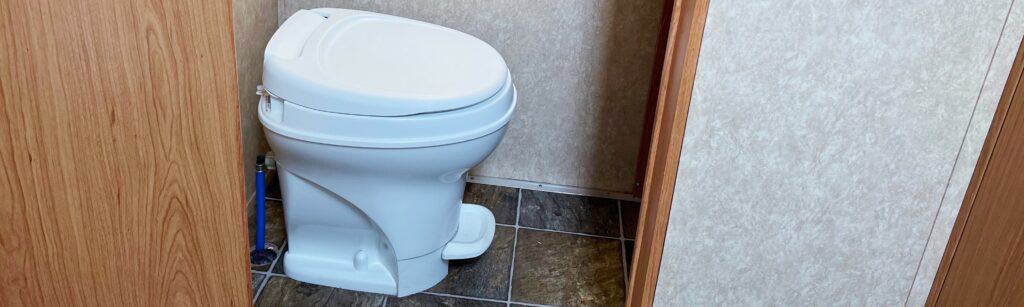
There are two main parts in the bottom of an RV toilet bowl. The flush ball that moves to open the toilet when you are flushing, and the toilet seal.
The toilet seal, also called the gasket, is the part that’s in charge of sealing the flush ball when it’s closed to hold water in the bowl and keep out unwanted odors.
If your RV toilet isn’t holding water, odds are the seal is the part to blame.
Replacing the RV toilet seal isn’t the most difficult repair job, but it requires getting your hands on the right part and removing the toilet bowl.
If your RV toilet is away from the wall and you have space to work it’s pretty easy but if you have an RV like mine the toilet bowl is against the wall and extremely difficult to work behind.
Before resorting to replacement here are a few things you can try to fix the seal and get your RV toilet holding water again.
See Also: Is Your RV Fridge Not Cooling? Try This One Simple Trick
Ways to Fix an RV Toilet That’s Not Holding Water
1. Cooking Oil
The gasket seal on an RV toilet needs to stay soft and pliable in order to create a seal that will trap water in the toilet bowl.
Lots of use or not enough use can cause the rubber to start to harden and even crack.
First, turn off the water pump or unhook your city water and flush the toilet until water stops coming out of the sprayer.
Then, with the toilet flush ball closed, pour whatever cooking oil you have on hand into the toilet boil. You want about 1/2 an inch of oil to be sitting in the bottom so it covers the seal.
You can use vegetable, canola, or olive oil for this. Most RVers seem to prefer olive oil but whatever you have on hand should do the trick.
See Also: Best Septic Safe RV Toilet Paper Brands Reviewed
Let the oil sit in the toilet bowl for a few minutes.
Then start working the flush ball by pressing on the flush pedal.
You want the oil to get all over the RV toilet seal so make sure you flush a few times so the flush ball spreads as much oil around the seal as possible.
Release the flush valve and wait a few more minutes before turning the water back on so the oil has time to work on the seal.
If this simple trick works your RV toilet should start holding water again.
2. Clean the Seal
If the simple oil trick didn’t work you might have to get a little more hands on with the RV toilet seal.
Since there’s water sitting on the seal all of the time it’s common for the inside of it to start building up limescale which can get in the way and stop the seal from being watertight.
Start by pouring some hot water with dish soap into the toilet bowl. Let it sit for a few minutes.
Because the toilet bowl is leaking and not holding water, some of the soapy water will be leaking into the black tank, but that’s ok.
You can even wait until all the water has leaked out if you want.
For this next part, you will need a toilet brush. A cheap one you won’t mind throwing away after is probably best.
Open the flush ball by holding down the flush pedal. It’s ok if the water is on for this part.
Clean the area around and under the toilet seal. Scrubbing up and down around the seal usually works best.
See Also: How To Install Solar Panel On RV Roof & Connect To Battery
An RV toilet seal is a double layered rubber ring with the inner circle open. The inside of this circle is usually what gets filled with limescale and other unwanted debris.
Clean as much as you can with the toilet brush.
If you have rubber gloves you can take a scrubber sponge and clean inside and around the seal by hand.
Make sure you don’t drop the sponge into the black tank though, that could cause an entirely new issue that isn’t easy to fix.
You can even remove the RV toilet seal and clean it by hand if it’s really dirty. But if you’re going to remove the toilet bowl you may as well just replace it entirely.
After cleaning the seal as much as possible you can try the oil trick as well to lubricate the seal.
These first two tricks work really well together and a good cleaning and oiling can usually solve the RV toilet not holding water issue.
3. Replace the RV Toilet Bowl Seal
If the first two tricks didn’t work the toilet seal may be too damaged to stop water from leaking out of the bowl.
Luckily, a replacement RV toilet seal or gasket is an easy part to find and the installation can be done by anyone who isn’t afraid to undo a few bolts.
The first step is to get your hands on the right RV toilet seal.
There aren’t a ton of RV toilet models out there so it’s mostly just a matter of finding out what brand of toilet is in your RV and the model.
This information can be found on the toilet or in the stack of manuals that came with your RV.
You can use the guide in the section below to find the right seal for your RV toilet.
Most of the time instructions are included with the toilet seal. If not the replacement is normally pretty straightforward.
All you have to do is turn off the RV water pump or disconnect your RV from city water so no water comes out of the toilet when you flush.
Then you unhook the water line behind the RV.
The toilet bowl is secured to the base with bolts that are inside the bowl.
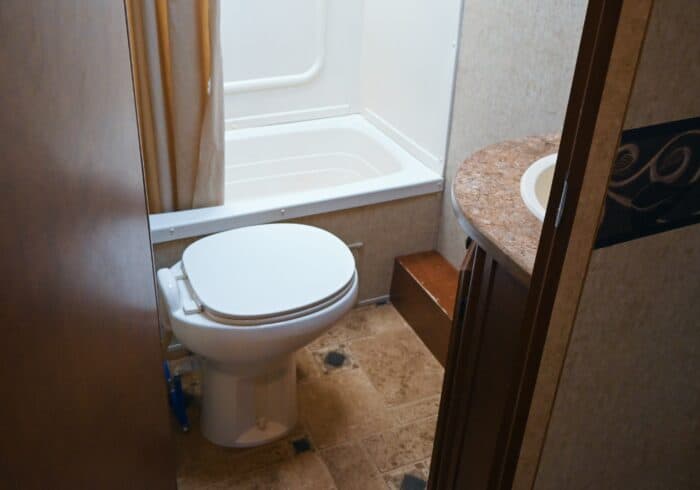
They can be accessed from behind the toilet. This is normally the most difficult part. Most RV toilets are installed with the back right up against the wall in a tiny bathroom.
Getting tools and your hands into the opening behind the toilet can be a challenge.
If it’s not possible to get behind the RV toilet you can remove the whole thing by undoing the bolts that secure it to the floor.
See Also: Can You Put A Composting Toilet In An RV/Camper/Van?
Make sure you only do this if you also have a closet flange seal (rubber gasket that sits between the base and the floor).
Normally the seal for the toilet bowl also includes a seal for the base.
Once the bolts are removed you remove the bowl by twisting it.
The seal you need to replace will be sitting on top of the flush ball. Make sure you install the new flush ball seal with the correct side facing up.
When you put the toilet bowl back on make sure the seal is centered correctly inside. You can sometimes move it into place after you’ve twisted the bowl back on and before you put the bolts in.
Tighten the bolts evenly so the seal doesn’t slip out of place.
After replacement, you may want to add some oil or toilet seal conditioner (reviewed below) to make sure it starts working correctly.
After a full replacement, your RV toilet should start holding water again.
If not you may have a bigger issue on your hands like a cracked flush ball or toilet bowl.
Guide to Thetford & Dometic RV Toilet Seals
Usually, the seal for RV toilet bowls, usually called the waste ball or blade seal, will be sold with a closet flange seal as well.
The closet flange seal is the seal that goes between the RV toilet and the floor.
It’s recommended to also replace the closet flange seal when you replace the waste ball seal but it’s up to you if you want to do it or not.
I only replaced the waste ball seal because I didn’t want to remove the entire RV toilet, the flange seal didn’t need to be replaced anyways.
When installing the new waste ball seal make sure you are using the right one. The closet flange seal is normally the thicker of the two, but check the included instructions to be sure.
Here are some links to RV toilet seals for the popular brands of RV toilets (click links to view on Amazon).
Compatible Thetford Models:
- Aqua Magic V Hand Flush (Low & High)
- Aqua Magic VI Pedal Flush
- Aqua Magic V Foot Flush
Thetford 34120 Blade Seal (also for part # 42141)
Compatible Thetford Models:
- Aqua Magic Style II
- Aqua Magic Residence
- Aqua Magic Style Plus
Thetford Aqua Magic Bravura Service Package (includes blade seal)
Thetford Aria Deluxe II 19627 Blade Seal
BougeRV Ball Seal (For Dometic)
Compatible Dometic Models:
- 300
- 301
- 310
- 311
- 320
- 321
RV Toilet Seal Maintenance
There’s a product out there that helps keep RV toilet seals in working condition so you don’t have to worry about future water holding issues.
Thetford RV Toilet Seal Lube & Conditioner

Thetford RV toilet seal lube and conditioner is a silicone based liquid that is used to maintain the waste ball seal.
The waste ball seal is what seals off the black tank and keeps water in the RV toilet bowl so no odors leak into the camper.
RV toilet seals are made of rubber. If not properly maintained they can dry out and start cracking, once this happens they no longer seal the toilet bowl.
It’s the reason an RV toilet will stop holding water.
The Thetford seal lube and conditioner is made for RV waste systems. When used it lubricates the seal and protects it from drying out.
While doing this it also helps the flush ball move more easily, if you’ve been having trouble with a sticky flush ball that doesn’t want to open or close easily, this is the solution.
See Also: What To Do When An RV Waste Tank (Black/Grey) Won’t Drain
On top of that, the lube gets into the RV black tank and helps keep the insides of the tank clean by preventing waste from sticking.
The black tank gate valve you use to dump your RV will also be lubricated.
As a side note if you’re having trouble with the gate valves to either your black or grey tank sticking Thetford also makes a drain valve lubricant (click to view on Amazon) that works really well.
To use the toilet seal lubricant, all you have to do is empty the water out of the toilet bowl, then dump in enough to cover the toilet waste ball seal.
Let it sit for at least 8 hours then keep using your RV toilet like normal.
Thetford RV Toilet Seal Lube & Conditioner is an excellent product to have on hand if you’re an RVer and a great way to make sure the toilet will always hold water.
Have any more questions about fixing RV toilets that won’t hold water? Leave a comment below.
Thanks Jenni! I just fixed toilet in my great west van. You gave me the confidence to do it and the instructions were spot on! Wasn’t hard but the toilet is right up against the wall. Thank goodness I do yoga!
Glad to hear you we’re able to fix it!
Hi, thanks for your information. I have a question for you. I have the Thetford style plus and I actually broke the little plastic ‘key’ inside the one side of the flushball arm. I heard it snap.
So I got a kit and replaced it and the seal. There was a lot of limescale on the old ball valve-which I’m sure is what caused it to break. I greased up the new ball seal real good, carefully centered the the bowl on the stand and tighten the bolts alternatively crosswise, etc.
But now when I flush and release the foot petal, the ball valve doesn’t shut all the way closed. It stays open enough so that it won’t hold water. I can close it manually with my finger and it will hold water but that’s not my idea of a good fix. I’ve both tightened and loosened the screw on ball valve arm but that didn’t help.
Any thoughts would greatly appreciated.
Thanks,
Karen
Hi Karen,
Does the ball valve close all the way if you push up on the flush lever? It could be a loose spring on the flush arm that’s causing it to not go back into place enough to close the ball valve all the way.
I have an Thetford Aqua Magic 4 toilet in my camper van. It wouldn’t hold water so I replaced the rubber seal and blade. In order to do that job I had to unscrew and separate the two sections of the toilet. To prevent sewer gases from escaping through the reassembled sections there is a caulk to reapply. What is it?
Hi Russ,
Usually you don’t need to caulk anywhere around an RV toilet. The seal between the two parts and between the base and the floor should be enough to keep any sewer gases from escaping the toilet.
There does need to be water in the toilet bowl to stop gases from leaking out from the ball valve.
I had a new Thetford Aqua Magic Residence toilet that would not hold water. I looked on Thetford’s FAQ site it suggested that the bowl bolts might be too tight. I loosened them just a little and now it holds water. Thought you might add that to your resolves.
Thanks for the tip Howard! I’ll add it to the list.