
 2024)
What Is RV Paneling?
If you’ve ever looked inside an RV, you’ve probably noticed that the paneling used on the ceiling differs from the paneling used on the walls.
RV ceiling panels are often made of FRP or PVC. It’s lightweight, moisture resistant, and is white without needing to be painted.
Related Product: Did you know RV Propane Detectors (click to view on Amazon) need to be replaced every 5-10 years? Make sure yours is still up to date before your next camping trip.
RV wall panels are usually made with thin plywood or MDF (medium density fiberboard) with wallpaper stuck to it.
On high end campers, you will sometimes find vinyl paneling used on the walls as well.
The ceiling also has a base layer of plywood as well but they have added the vinyl or PVC paneling over it.
So why would you need to get your hands on some RV paneling?
Mold and water damage is the number one reason people need to replace the walls or ceiling in an RV.
It’s a problem that needs to be taken care of right away before more than just the paneling needs to be replaced.
Related: RV Condensation And 14 Ways To Prevent Mold In Your Trailer
It’s also common for camper paneling to get a little beat up from things falling during travel and general use.
In a small RV, it’s easy to accidentally bump into things and break them.
Or you might just be remodeling an old camper or even building one inside of a van or school bus.
Whatever the need, this post is just to help you understand how simple RV paneling is and give you some ideas for what to use to decorate the new panel once you’ve nailed or stapled it in place.

Where To Buy RV Wall & Ceiling Paneling
The Hardware Or Lumber Store
1/8 inch plywood, utility paneling, or MDF boards from your local hardware store is perfect for replacement RV wall paneling.
For RV ceilings, you can normally find some FRP board at hardware stores as well.
Hardware stores are a fantastic place to get RV paneling because they often have larger board sizes and some places will even cut the panels to size for you.
A thin lightweight board that’s stapled to the wall studs or ceiling supports is really all the inner walls are made of.
The tough part about installation will be cutting out areas where there are cabinets, windows, and outlets.
See Also: What Backup Camera Is Your RV or Trailer Pre-Wired For?
Online
Getting large paneling online can be a bit of a challenge.
Many online retailers often charge high shipping rates for the size of RV panels you are going to need.
Large hardware stores with online shopping like Home Depot and Lowes are a good place to look first.
If large wood boards aren’t a good option for you, shiplap is a fantastic way to replace the paneling in an RV.
It comes in smaller pieces that are easier to manage and cut. It also looks fantastic inside campers, vans, and skoolies.
This Timeline Shiplap (click to view on Amazon) is made of 3/16 inch thick MDF boards that are 72 inches long and 5 inches wide.
It creates a lightweight and realistic looking shiplap that is pre-painted white.
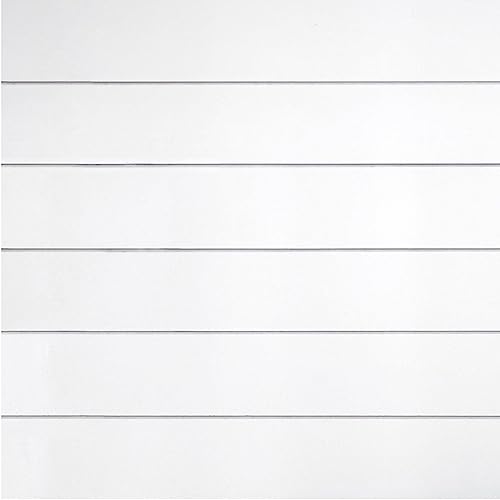
It’s going to look awesome and you don’t need to track down any 1/8 inch plywood to put up first.
Because shiplap is small boards you put together like a puzzle, it’s easier to cut to fit around cabinets and windows.
Another benefit to this type of shiplap is there’s no more work once it’s installed because it comes pre painted and ready to go.
See Also: 7 Must Haves For Organizing Small RV Kitchens & Cabinets

How To Install RV Paneling
Most RV paneling is stapled directly to the studs in the walls or the support beams on the ceiling.
If you look closely, you can often see the putty they used to cover the staples.
Some RV manufacturers don’t even go that far. They just staple up the panels and leave it at that.
If you are planning on covering the wood RV paneling with some wallpaper or vinyl panels, nailing or stapling the panels directly to the studs will work just fine.
If you are installing shiplap, like the one linked to in the section above, you will also be able to nail it directly to the studs.
Just make sure you put the nails on the part the next board will cover.
See Also: How To Wire Multiple 12V Or 6V Batteries To An RV

How To Make The New RV Paneling Look Good
RV Wall Panels
Once you’ve replaced the wooden part of the RV wall, you are going to need to get some paint, wallpaper, or vinyl paneling to make it look good.
If you only needed to replace a small section or one wall inside your RV because of mold damage or something else, you can make it look good without having to redo the entire camper.
Brick (click to view on Amazon) or wood panel (click to view on Amazon) patterned peel and stick wallpaper will create an accent wall.
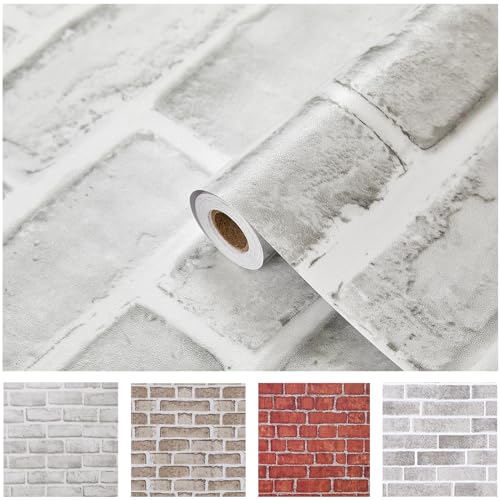
Accent walls add an extra element of design and coziness to homes, so why not use them in RVs as well?
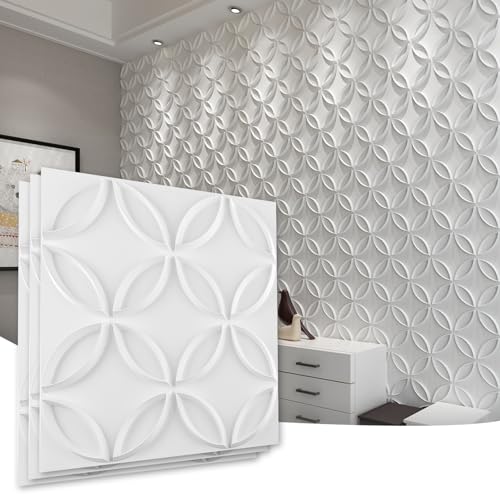
Another, more modern option, that works well on camper walls and ceilings are 3D PVC panels (click to view on Amazon).
These are often sold in large squares that are lightweight and very easy to handle. You can simply glue or nail them in place.
Most RVers prefer using wallpaper and stick on paneling instead of paint because it’s easy to install and doesn’t require multiple coats of special paint that can stick to the wallpaper on the original RV wall paneling.
It’s also a lot less messy and there’s minimal prep work.
See Also: Best Portable Power Station/Solar Generator For Camping
RV Ceiling Panels
The 3D PVC paneling I linked to above works on camper ceilings as well, but you can also use ceiling tiles like these (click to view on Amazon) for a vintage look.
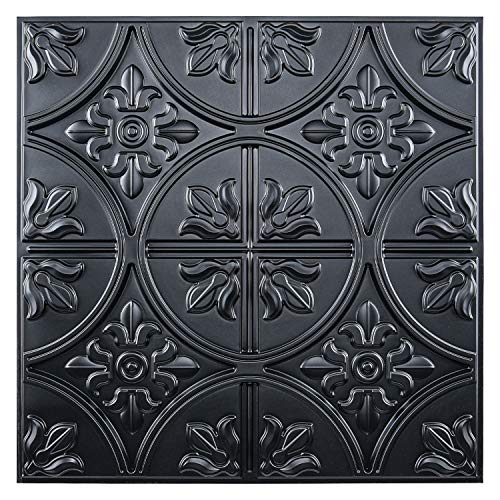
If you want to follow the trend you can go with the famous copper version (click to view on Amazon).
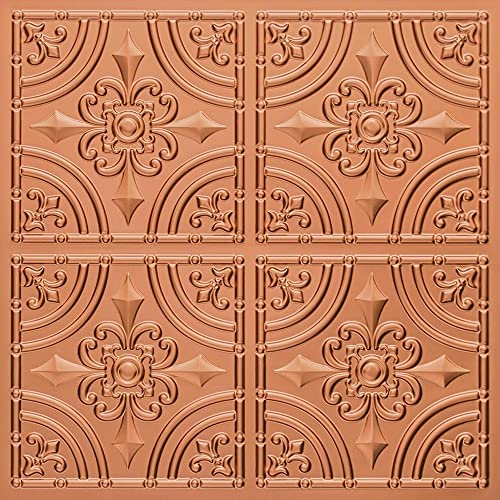
It goes well with the common brown interior older RVs normally have, looks unique, and adds a little flair.
It’s a simple way to make things look a little more stylish.
If you needed to replace an RV ceiling panel because of water damage from a leaky skylight or vent, it’s a great upgrade.
See Also: Is Your RV Fridge Not Cooling? Try This One Simple Trick
Frequently Asked Questions About RV Paneling
What materials are used for RV walls?
Normally, a camper’s walls are covered in 1/8 inch plywood or birch board that has a thin layer of wallpaper on it.
It’s lightweight and easy to stick wallpaper to, that’s why it’s the most common type of paneling found in a camper.
How thick is RV paneling?
RV paneling is normally only 1/8 an inch thick.
It can seem thicker if there’s another layer of PVC or vinyl paneling on it, but most companies keep the wall and ceiling paneling very thin to save on material costs and weight.
How do you install RV paneling?
Installing RV paneling is fairly simple. It’s nailed or stapled to the studs or ceiling supports that are already there.
The hardest part is cutting out the spots for windows, cabinets, and outlets.
You also want to be careful and keep an eye out for any electrical wiring or pipes in the walls.
How do you repair a rotted RV wall?
If it’s the camper wall paneling that’s been affected, you need to remove the entire piece and then some to make sure all the mold has been taken out.
Go to the local hardware store first and see what size of 1/8 inch plywood they have.
Cut out the paneling in your RV to match the width and length of the new piece.
If the studs are still in good shape, you can scrub off any mold on them, let them dry for a few days, and add some mold treatment (click to view on Amazon).
If the studs are rotted, they are going to need to be replaced as well.
See Also: RV Condensation And 14 Ways To Prevent Mold In Your Trailer
If you don’t get all the mold, it will just keep coming back. It might seem like a lot of work, but it’s worth it to get it all out the first time.
After nailing or stapling on the new wooden panel, you face two options.
You can remodel all the walls in the camper to match the new wall or just turn the new panel into an accent piece.
Easy to install peel-and-stick wallpaper with patterns like brick (click to view on Amazon) make it seem like it was redone on purpose.
This works especially well if you are replacing the back wall in an RV.
Do RV walls and ceilings have studs?
Yes, they do.
Inner walls are always going to have wooden studs, but if it’s an outer wall, the studs might be made of aluminum or steel, depending on what kind of camper trailer or RV you have.
Ceiling studs are normally wood, but there can be a few steel supports mixed in as well.
What Is FRP Paneling?
FRP stands for fiber reinforced plastic.
FRP paneling is thin, lightweight boards made with polyester resin and reinforced with fiberglass.
These kinds of panels are popular to use for the ceiling paneling inside campers because it’s already white, it’s very durable, lightweight, and easy to install.
Have any more questions about RV paneling? Leave a comment below.
How can I staple into the aluminum frame?
Hi Joel,
A heavy duty 18 or 16 gauge pneumatic stapler with the right kind of staples should be able to go through aluminum framing. But you could use thin self tapping screws or even try and hammer serrated paneling nails into the aluminum.
What kind of staples should I use?
Narrow crown staples like these (click to view on Amazon) are a good choice for paneling.
Visqueen? Pardon the speeling or somethi g starti g with a v? The.thin wood used in old vintage trailers? Is that what it called.thin paneling In the. 40s 50s
Hi Laurinda,
I’m not sure what the official name for it would have been but I think you might be thinking of Veneer Paneling (click to view on Amazon).
It’s the super thin slices of wood paneling commonly used in RVs. You can also get veneer banding to go around difficult corners (click to view on Amazon).
It’s great stuff for RV use since it’s lightweight and easy to mount.
Luan board
is there anything different with campers like the 60’s Scotsman that used a “solid plywood construction”
Hi Loren,
I think the biggest difference is that they were constructed without studs. That means the frame and shape are made up of solid sheets of plywood.
Where can I purchase RV wood vinyl ceiling panels
Hi Katy,
If you mean just the regular panels that the ceiling is made of, Lowes has a wall panel that works great for RV ceilings.
the paper is peeling off my RV wallboard. can i paper on top of this What make of wall paper to do the job?
The wallpaper in RVs is similar to regular wallpaper. Before wallpapering over the top you should make sure that any peeling or bubbling wallpaper is removed so the new wallpaper has something solid to stick to.
I think any kind of wallpaper will work. If it were me I would use Peel and Stick Wallpaper (click to view on Amazon).
It doesn’t require glue so there’s less risk of the old wallpaper peeling from the moisture, it’s very easy to hang, and it’s easy to remove if you ever need to fix anything behind it or change it.
FlexStone™ single interior decorative wall panels in a variety of stunning design styles.
Wall panels have patterns in a variety of stone look, marble look, granite look and onyx look styles.
The wall paneling sheets are made of PVC, stone powder and nano bamboo fibers.
The manufacturing process creates wall panels that are waterproof, mildewproof, durable, easy to clean & formaldehyde free.
Please visit our Website for complete info: https://flexstonedesign.ca/