Making Coffee With No Electricity Outdoors
There’s nothing better than a hot cup of morning coffee when you’re camping.
Whether it’s made over a campfire or on a camp stove there’s nothing quite like the taste of camping coffee.
Coffee can be brewed a ton of different ways, and many of them are perfect for the outdoors.
Related Product: Keep your freshly brewed camp coffee hot in a durable Yeti Ramber Vacuum Insulated Stainless Steel Mug (click to view on Amazon)
Below I’ll talk about 6 of the best ways to make coffee while camping.
Some make stronger coffee than others and the way you decide to make coffee mostly depends on your heat source and taste.
Just as a warning, most of these coffee making styles do brew some extra strong coffee, but for some, that’s just another part of the magic of camping.
6 Ways To Make Coffee While Camping
1. Drip Coffee
How To Make Camping Drip Coffee
Camping drip coffee is going to be best for those making coffee for just themselves or maybe one other person.
It’s the closest to the kind of coffee your drip coffee maker makes at home so it’s a good choice if you don’t like strong coffee.
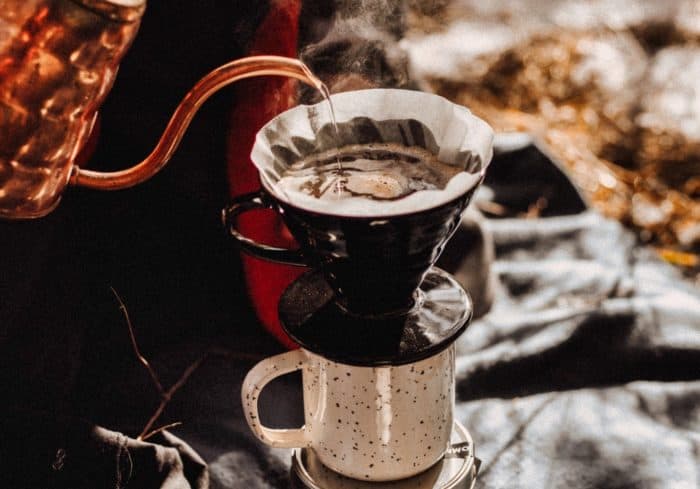
To make drip coffee while camping just take your choice of a coffee cone, put in your paper filter, fill it with coffee grounds, put it over your camp mug, and pour boiling water onto the coffee grounds.
The concept is exactly the same as an electric drip coffee maker. It actually makes better coffee than your standard coffee maker because you’re using hotter water than what an electric coffee maker usually produces.
To make drip coffee while camping you will need a portable drip coffee cone and a way to get boiling water.
See Also: Best Non-Electric Coffee Makers For Camping & Daily Use
Gear Needed
Some of the most popular drip coffee cones for the outdoors are the GSI Outdoors Collapsible Pourover Coffee Maker (click to view on Amazon) and the Melitta Filter Coffee Maker (click to view on Amazon).
The GSI collapsible pour over coffee maker is the most portable and lightweight option. It can also make drip camping coffee for the most people.
It’s a silicone cup that can collapse down into the built in case that doubles as the base that stabilizes the cup over your mug.
There’s a lid that snaps onto the base for a simple and clean carry case you can throw in your backpack when you’re done using it.
It uses number 4 coffee filters (click to view on Amazon) that can brew coffee for 1-4 people.
The Melitta filter coffee maker is the one I actually use in my RV when making coffee for myself. It’s not as portable as the GSI one but it’s really easy to use and makes excellent drip coffee when camping.
It’s a hard plastic drip coffee cone that sits on a round base that has a gap to allow airflow and stop the annoying vacuum that can be created when using this style of coffee maker.
It’s lightweight and pretty small. There’s no case for it so you might need to clean it off when you take it out to use it.
It uses the smaller number 2 coffee filters (click to view on Amazon) that can make coffee for around 1-2 people.
No matter what style of camping drip coffee maker you use a way to get boiling water is also necessary for making coffee this way.
The kettles used to make cowboy coffee below are great for getting boiling water via a campfire or camp stove for drip coffee.
2. Cowboy Coffee
How To Make Cowboy/Campfire Coffee
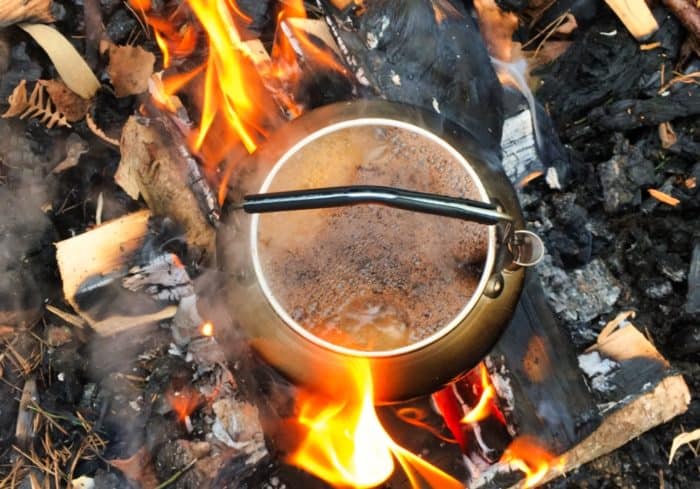
Cowboy coffee is an old classic, no it doesn’t always make the world’s best tasting coffee but for many, it’s a camping tradition. It’s also the way that requires the least amount of accessories to make coffee while camping.
It’s traditionally made over a campfire but you can also make it using a camp stove.
All you need to make cowboy or campfire coffee is a good kettle and some coarse ground coffee.
What you do is take a kettle and fill it with water. Then add your coarse ground coffee. Use one tablespoon of coffee for every cup of water.
You can adjust the ratio later depending on how strong you want your coffee.
Then put the kettle filled with water and coffee onto your heat source, it can be a stove or campfire.
When the water starts to boil take it off the heat and let it sit for a few minutes. You want the coffee grounds to settle to the bottom of the kettle.
See Also: Best Propane Camping Stoves – From Small To Large
Now for the fun part, trying to pour the coffee into a mug without getting a ton of coffee grounds in there as well.
Because you’re not using any kind of filter the coffee grounds can easily get into your coffee mug. That’s why you want to use a course ground so it will settle on the bottom and stay there.
You can make cowboy or campfire coffee nicer by using a strainer when pouring the coffee from the kettle but where’s the fun in that?
Cowboy coffee is all about simplicity and using just a kettle to make coffee. It’s the easiest way to make camping coffee but also the least refined.
Gear Needed
For campfires, a good stainless steel camping kettle with no parts that can melt is a good choice. The Fire-Maple Antarcti Stainless Steel Camping Kettle (click to view on Amazon) is one of those kettles.
Made with durable and food safe stainless steel this lightweight but sturdy camping kettle can make campfire coffee using any heat source.
It can hold 1 liter of water so you can make campfire coffee for multiple people and it comes with a mesh storage bag.
The spout is high up on the top which is better for keeping out the loose coffee grounds when pouring.
A more lightweight option for backpackers is an aluminum kettle like the Redcamp Aluminum Outdoor Camping Kettle (click to view on Amazon).
It’s got the high up spout which is what you want for keeping the coffee grounds out and there are different size options for making different amounts of camping coffee.
It does have some plastic parts. There’s a heatproof plastic coating on the handle and it comes with a plastic lid.
If you use this over a campfire make sure you make a spot that only has hot coals and no flames so the handle and lid don’t melt.
Coarse ground coffee is pretty easy to find in stores. It’s mostly used for cold brew coffee so looking for bags of coffee labeled to make cold brew should work well for cowboy coffee.
The Wandering Bear Coarse Ground Coffee (click to view on Amazon) has big coffee grounds that are great for this style of camping coffee.
3. Percolator Coffee
How To Make Percolator Coffee
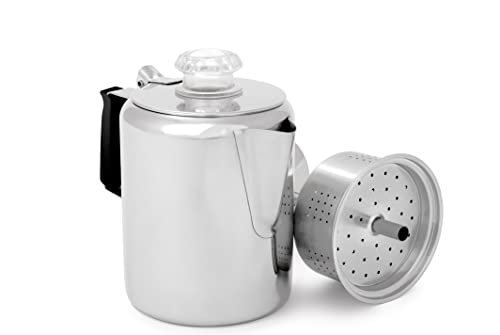
Percolator coffee is the more fancy version of cowboy coffee. It uses a specially made kettle and a filter to make ground free coffee.
It does take the longest to brew when compared to the other styles in this article but it’s another camping classic.
If you’ve been camping with your grandparents, chances are you’ve had percolator coffee.
To make percolator coffee when camping you fill the percolator with water. The coffee grounds are added to a basket that will sit at the top of the percolator above the water.
Regular/drip coffee grounds work perfectly for percolator coffee. Use about 1 tablespoon for every cup of water.
There’s a special paper filter that goes inside of the basket as well. Don’t forget it otherwise, you will have a ton of grounds in your coffee.
See Also: Best 12 Volt Coffee Maker For Cars, Truckers, Boat & RV
Once you’ve added the coffee and water you put the coffee percolator over a heat source. You are going to need constant heat so a camp stove is usually best but in a pinch, you can use hot coals from a campfire.
Coffee percolators have a clear knob or globe on the lid you can see the hot water shooting into. Keep an eye on that globe.
Start with the heat on high, when you start to see water shooting into the globe turn down the heat to low. You should see some bubbles in it but not water.
If you see water in it or the water is boiling in the percolator you need to turn the heat down a little more.
Brew the coffee for about 10 minutes. Remember, no boiling water. You want a low heat that keeps the water hot so it can get into the raised coffee basket to soak the grounds.
After 10 minutes remove the percolator from the heat source and you’re ready to enjoy some amazing camping coffee.
You do not need to remove the coffee grounds before pouring.
Gear Needed
There are some really great coffee percolator options out there in different sizes.
The Coletti Bozeman Coffee Percolator (click to view on Amazon) is one of the most popular for campers and for good reason.
It’s made with a hardwood handle and stainless steel that can take heat from any kind of stove and even campfires.
I really like the wooden handle because there’s no risk of it melting if you use campfire coals.
The clear globe on the top is made with tempered glass. That means it won’t yellow over time which is a problem that’s common with plastic globes.
The Coletti percolator is made with quality parts that will last.
There is a 9 and 12 cup version but each version can make smaller amounts of coffee as well.
Another good option is the GSI Outdoors Glacier Percolator (click to view on Amazon).
The cool thing about the GSI version is it comes in 4 different sizes including an extra small 3 cup version.
The body is made with stainless steel and the handle has a heat-resistant silicone coating.
The globe is made with unbreakable resin. It’s fantastic for campers because it’s super tough but there is some chance of it yellowing over time.
Luckily, GSI makes a replacement for the globe just in case that happens.
The filters that work for both of the camping percolators reviewed above are the Melitta Disc Coffee Filters (click to view on Amazon).
4. Moka Coffee
How To Make Moka Coffee
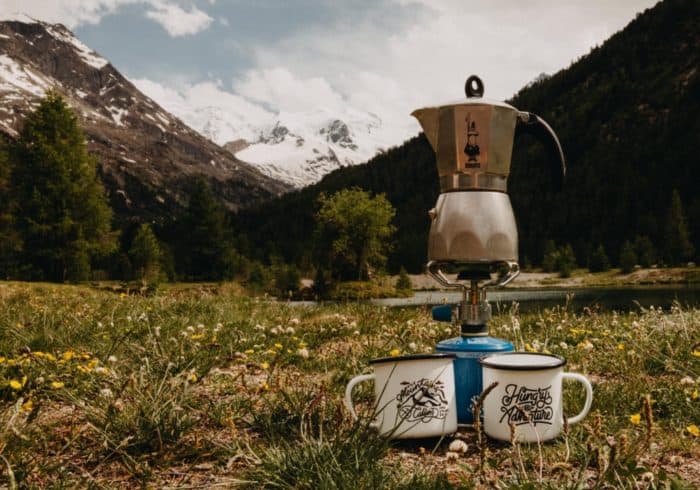
A Moka coffee maker is like an advanced version of a percolator. Instead of the hot water being mixed with the water in the kettle it gets transferred to a separate area which helps reduce the risk of your coffee getting burned and bitter.
It also produces a stronger more espresso like brew and uses no paper filter.
To make coffee in a Moka you fill the base of the Moka with water. Don’t overfill, the waterline needs to end before the safety pressure valve on the side.
Next is the coffee funnel. You can use regular drip coffee grounds but it’s recommended to use a slightly finer grind if you can.
You fill the funnel with coffee but don’t pack it in. Just fill the funnel, make the coffee level on top, and put the next piece.
See Also: Best Small RV Coffee Maker & K-Cup RV Coffee Maker
The top part of a Moka is called the spout. It’s where the coffee ends up after the brewing process.
To heat the water you will need a small flame source. This isn’t a good option for the campfire. A Moka is for stoves only.
It works especially well with small backpacking stoves.
Heat up the water in the Moka over medium heat. You want it to take a minute for the pressure to build.
When the water reaches a boil it will push through the coffee funnel and into the spout.
You know when the brew is done when you hear a gurgling sound. That’s air getting pushed into the spout. That sound means no more water is left in the base.
Your Moka espresso is now done and ready to be enjoyed.
Gear Needed
There are a bunch of different Moka coffee makers out there but the original is made by a company called Bialetti. It’s an Italian coffee maker and Bialetti is the Italian company that first came up with the design.
The Original Moka Express (click to view on Amazon) is made with aluminum making it super lightweight and durable for camping.
Made in Italy this is the most authentic Moka coffee maker you can get.
There are 4 different size options available.
It’s super easy to clean, and all you need to make coffee with it is a camp stove and coffee.
If you like strong espresso like coffee this is a fantastic option. It’s not going to let coffee grounds into your coffee cup and it’s really easy to pack around.
5. French Press Coffee
How To Make French Press Coffee
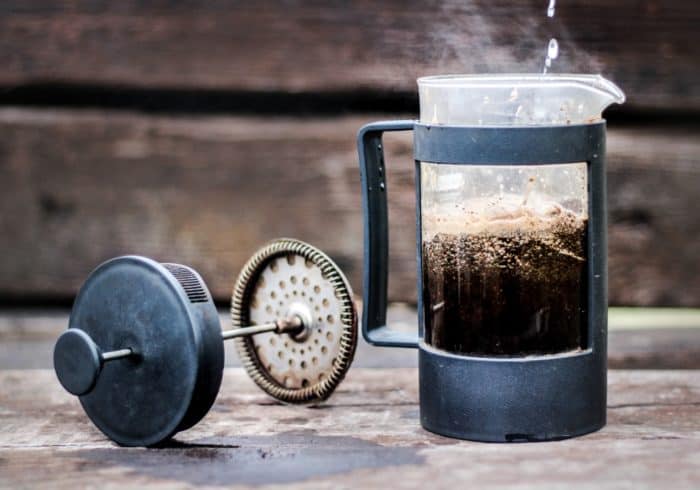
Normal french press coffee makers are basically a pitcher that you pour hot water into, but camping french press coffee makers double as both a kettle and a french press.
You can also get portable french presses that you pour hot water into but for camping the do it all version is more versatile because you can use the kettle part for boiling water for other things.
To make french press coffee while camping you will first boil the water in the kettle part. Once it’s reached a boil remove it from heat and add your coffee grounds.
See Also: 6 Best Camping Wool Blanket Reviews For Tent, RV & Van
You want to use coarser french press coffee grounds and it’s about 2 tablespoons per cup of water.
Let the coffee grounds sit in the hot water for a few minutes then using the filter/press part push down the coffee grounds slowly.
The press pulls the flavors out of the coffee grounds and also removes them from the final coffee.
You can now enjoy your camping coffee.
Gear Needed
If you already have a camping kettle you can just get a portable camping french press like this one by GSI (click to view on Amazon).
You can add boiled water from your kettle and make delicious coffee.
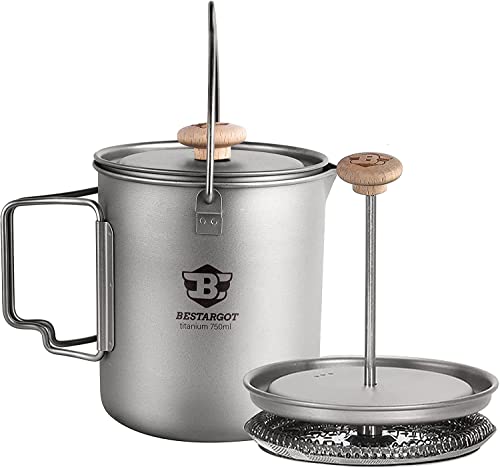
If you don’t already have a kettle to boil water a fantastic option is the Bestargot Titanium French Press (click to view Amazon).
This lightweight titanium camp cup can hold 750 milliliters of liquid and it comes with a french press for making coffee.
You can use it over a stove or campfire. There’s a metal handle on the side as well as the top for multiple uses and there’s even a spout for pouring.
When you’re camping you don’t want to have to bring a lot of stuff. Things like this french press are perfect for that.
You’re basically getting the ease of campfire coffee without having to deal with coffee grounds in your cup.
There are no extra paper filters you need to bring along and it’s super easy to clean.
6. Espresso Coffee
How To Make Camping Espresso
Last but not least, camping espresso. Some of the methods in this article are making something similar to espresso but none of them are using the official technique to get that dark, smooth cup of go juice.
To make espresso when camping all you need is a portable press and some boiling water.
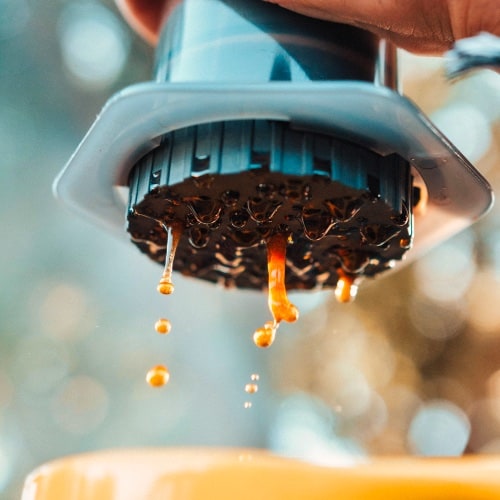
Portable espresso makers are really easy to use. Just tap down the espresso coffee grounds in the designated spot, fill one end with hot water, and press out your espresso.
It’s really fast and makes delicious camping coffee. The only downside is there are a few more moving parts you have to worry about.
Gear Needed
One really popular option for campers who want to make espresso is the Wacaco Minipresso GR (click to view on Amazon).
Using a small and portable unit all you have to do is fill a small basket with coffee, add hot water into the water tank on the opposite side, then press a lever on the side slowly to press the espresso into the included cup.
It’s fast, requires no paper filters, and you can technically use a campfire to heat the water for it so it’s very versatile.
You can even use other kinds of coffee grounds for different strengths and flavors.
Another very popular option that’s a little more simple is the AeroPress Go Portable Coffee Press (click to view on Amazon).
The AeroPress has been around for a while and I’ve used their full sized version to make coffee when camping but this version is even more portable and convenient.
It’s basically a giant syringe. You pack the coffee grounds at one end of it with a small custom sized paper filter.
You then put it over the included travel mug or your own camp mug, fill the water reservoir with hot water, then slowly press the water through the grounds with the plunger end.
The entire thing fits into the small included travel mug and there’s a little lid that holds it all together.
It makes espresso and even drip coffee.
If you like the kind of coffee that comes from paper filters then this is a fantastic option.
You can even use it with cold water for a fast and simple cold brew.
Have any questions about making coffee while camping? Leave a comment below.
