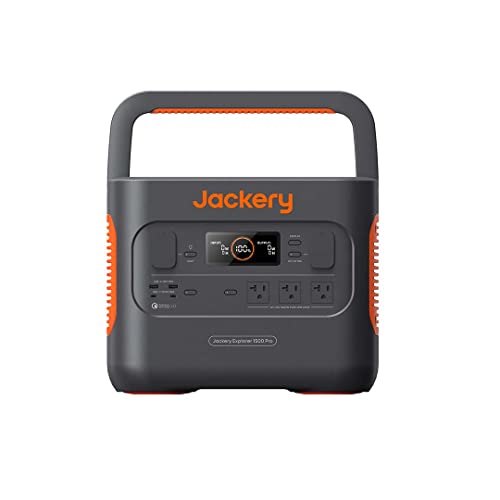
How To Connect Solar Panels To The New Jackery Explorer Pro And Plus Power Stations
I have written several articles about Jackery and how you can connect third party solar panels to its power stations. Click here for a list of them all.
In this article I am going to focus on the newer models, the Pro and Plus. They’re available in several sizes, from the smallest 100 Plus with 99Wh to 3000 Pro with 3024Wh.
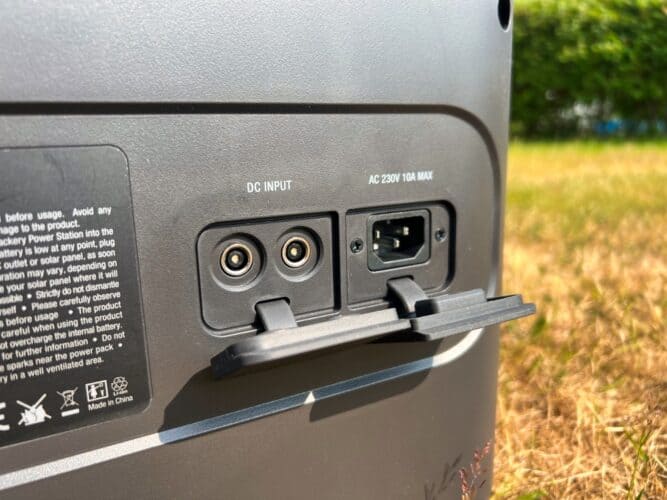
First I am going to list all these portable batteries and their specifications, so we can get a quick overview of what they’re capable of. Then I’ll talk about the most important things you need to know, before I share some solar panel recommendations.
As always, please leave a comment if something is unclear or you have a question. The more information you can share, the better and easier it will be for me to help.
Jackery Explorer Pro & Plus Power Stations – Specifications
The power stations below are the Pro and Plus models sold in the US currently (feb 2024). If you have a different version and believe the information in this article doesn’t apply to yours, let me know by leaving a comment.
Last update on 2024-04-25 / Affiliate links / Images from Amazon Product Advertising API
The Explorer 100 Plus
I could only put six batteries on the table above, so I skipped the 100 Plus and 700 Plus. If you have the 100 Plus, here is a quick summary of things you need to know:
All of these also apply to the Explorer 300 Plus.
- It charges through USB C
- Maxes out at 100W input
- It supports solar panels with a working voltage between 18-27V
- It includes a DC8020 to USB C adapter, for use with SolarSaga panels
- If a third party solar panel has a USB C PD port, it can charge this power station
The 700 Plus is more like the larger models, with two DC8020 input ports, 12-60V input rating range, up to 400W input. It also includes two DC7909 to DC8020 adapters.
The Do’s & Don’ts – Connecting Solar Panels To An Explorer Pro/Plus Power Station
Before I list solar panel recommendations, here is a summary of the things you need to know. Make sure you read through both the do’s and don’ts.
If anything is unclear, please leave a comment and I’ll try to explain it better.
Do
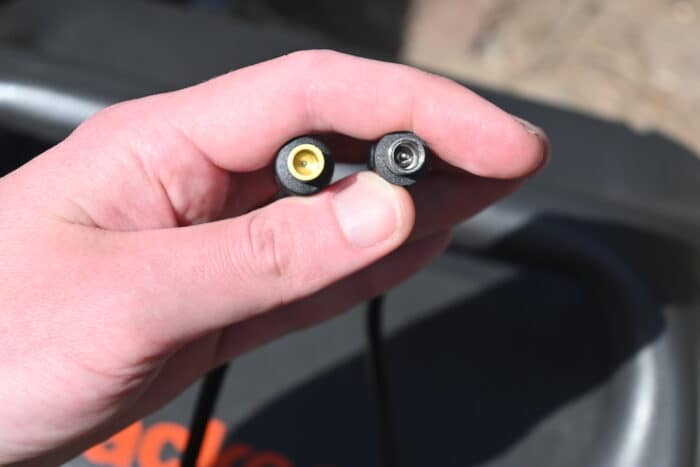
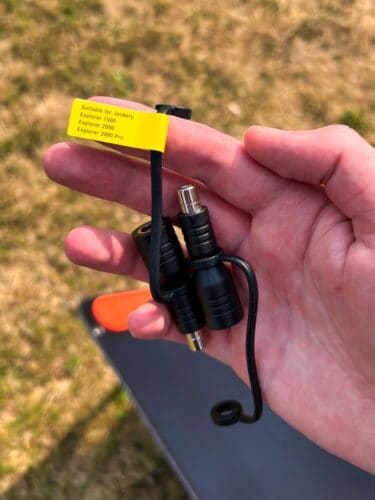
- Use the DC7909 to DC8020 adapters if you have already purchased a non-Jackery panel that came with an 8mm connector.
- Use the SolarEnz MC4 to DC adapter (click to view on Amazon) + the DC7909 to DC8020 included with the Explorer (or the SolarEnz one) to connect compatible third party panels that use MC4 connectors. Like panels by Renogy, Eco-Worthy, 9BB, Newpowa, and AcoPower.
- Bypass the solar charge controller on your solar panel, if you have already bought one with a charge controller.
- Make sure the total working voltage (VMP) of your panel(s) is within the support input voltage range before you connect anything to the input port.
- Also make sure every adapter and connector you use can handle the total working voltage and amperages if you use several panels or a single large panel.
- Use an DC8020 Y branch if you want to connect two SolarSaga 100/200 together in series. Casimy makes an adapter for this (click to view on Amazon)
- Check the polarity (positive to positive, negative to negative) of your panels and adapters to make sure it’s correct before connecting anything to the Jackery power station. A multimeter like this one by AstroAI (click to view on Amazon) is an easy-to-use helpful tool for this.
- Use the Jackery Series Connector adapter (click to view on Amazon) if you want to connect three SolarSaga 100/200. Use two adapters to connect six panels.
Don’t
- Don’t buy a solar panel with a charge controller, since the Jackery power stations have these built-in already. You can’t use two charge controllers.
- Connect a DC7909 connector to the DC8020 input on the Jackery, it won’t work. If you have purchased a third party panel that came with an 8mm connector, you must use the adapter included by Jackery.
- Mix solar panels with different voltages and amperage ratings. It’s OK if you’re only using one input port, but not recommended.
- Charge an Explorer Pro or Plus with solar and the car charger at the same time.
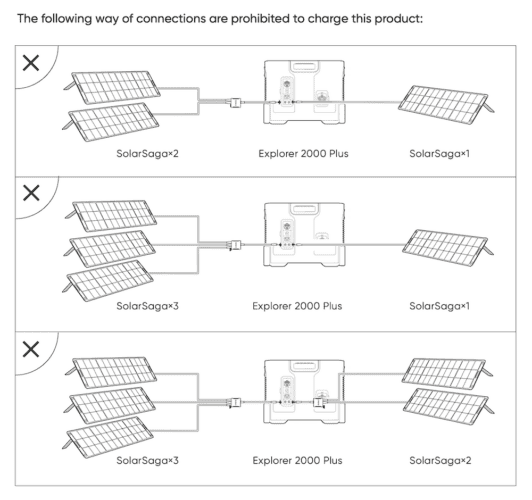
- Connect different sized panels to the Jackery Explorers that have two 8mm inputs. If both inputs are used, they must receive the same working voltage. See the illustration from one of the manuals below.
- Don’t exceed the upper voltage limit. This is most likely to happen when wiring too many panels in series, or using 24V panels.
The Jackery SolarSaga Panels
Most of you might be here because you want to connect third party panels, but here is a list of the different SolarSaga panels, what they include, and how you can use them to charge the Explorer Pro and Plus models.
- SolarSaga 80 – Uses a DC8020 connector. Includes a 6 feet extension cable with a DC8020 to DC7909 on the end of it. Compatible with both old and new Explorer power stations. You can combine several of these, but remember that the voltage must match if you use both inputs on the battery. Has a parallel port for easy connection to a second panel.
- SolarSaga 100 & SolarSaga 100X – These use the DC7909 connector. Compatible with both old and new models (with the DC7909 to DC8020 adapter). You can combine several of these, but remember that the voltage must match if you use both inputs on the battery.
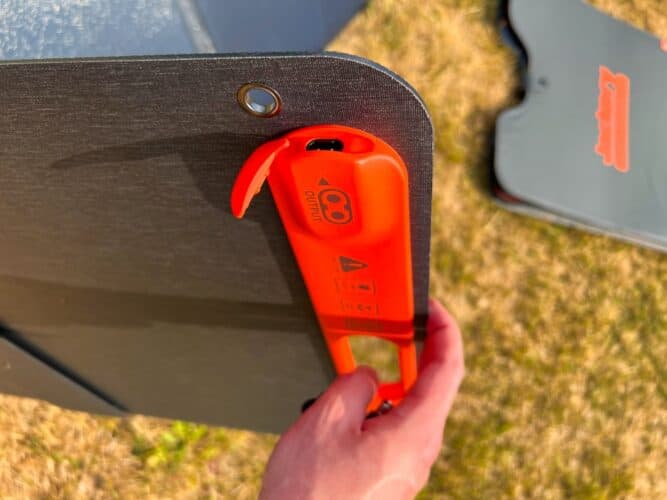
- SolarSaga 200 – Uses the DC7909 connector but comes with a cable that has a DC7909 to DC8020 adapter on the end of it. The cable is detachable from the panel.
Third Party Solar Panel Recommendations
Since there are so many different type of panels, I am going to divide them into two categories: portable and rigid panels.
Portable panels
Usually foldable and great for people on the go that need to be able to easily and quickly put away the panels. These are sometimes but not always water-resistant because of the materials they’re made with.
A big pro with portable panels is that they’re often lighter than rigid panels.
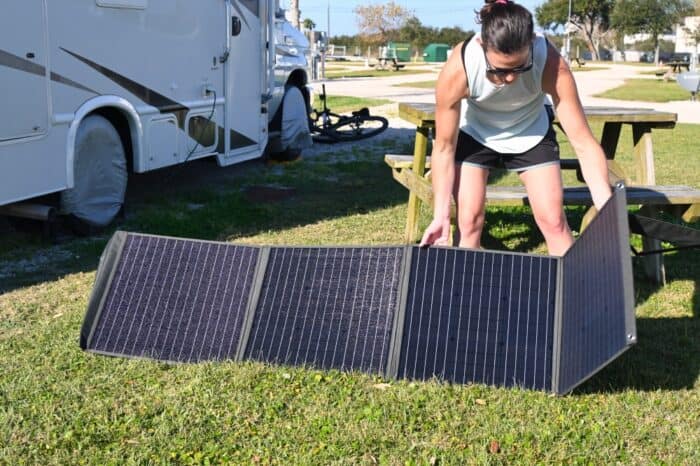
A downside with them being light is that they can blow over, I have had it happen multiple times.
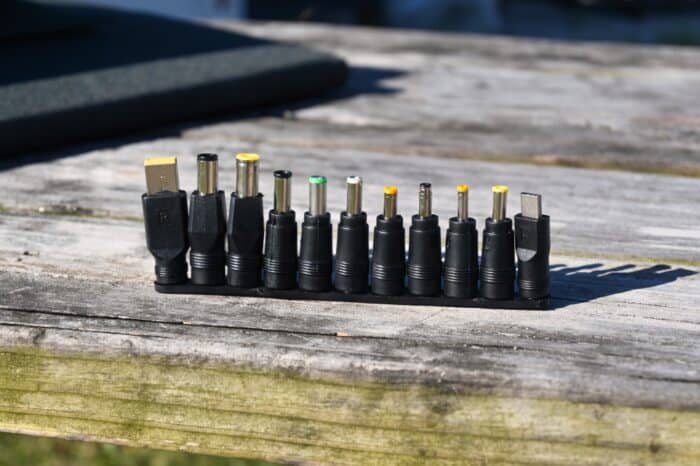
Below are some of my recommendations, all of these are compatible voltage- and amperage-wise with the Jackery Explorer power stations. They do require the use of the DC7909 to DC8020 adapter, unless stated otherwise.
The links below lead to the product page on Amazon.
- Enofolo 30W Foldable Solar Panel – Includes several connectors, one being the DC7909. Also has a USB port, to charge devices directly. Available in different sizes.
- Lumopal 60W Folding Solar Panel – Includes several connectors, one being the DC7909. Also has two USB A ports, one USB C, to charge devices directly.
- Itehil 100W Monocrystalline Solar Panel – Includes several connectors, one being the DC7909. Also has two USB A ports, to charge devices directly. Available in different sizes.
- Dokio 110W Foldable Solar Panel Kit – Includes a solar charge controller that can be bypassed. Use the charge controller if you want to charge a 12V battery like in an RV, but don’t use it with power stations like the Jackery Explorer. Just connect the panel directly to the Jackery with the included 8mm adapter. Available in different sizes.
- Allpowers SP029 140W Portable Solar Panel – Includes several connectors, one being the DC7909. Also has two USB A ports, one USB C, to charge devices directly. Has a parallel port, so you can combine two of the same panels together for a faster charge.
- Sunsul 160W Foldable Solar Panel – Includes several connectors, one being the DC7909. Available in different sizes.
- Allpowers SP033 200W Portable Solar Panel – Includes several connectors, one being the DC7909.
- Elecaenta 300W Portable Solar Panel – Includes several connectors, one being the DC8020 (according to the description). Available in different sizes.
Note: Sometimes a DC7909 connector is too short or long for the DC8020 connector. If any of the panels above are not compatible with the Jackery DC8020 adapter, please let me know. It will be very helpful to make sure this article has accurate information.
Rigid panels
Great for more permanent installations, like on top of a cabin or RV roof. Heavier, but more durable in my experience. Often IP67 waterproof rating which means they can be left out in the rain.
A downside with them not being foldable is that they take up a lot of space when stored, which is why portable panels are what I prefer to travel with. I do have rigid panels on top of my camper though.
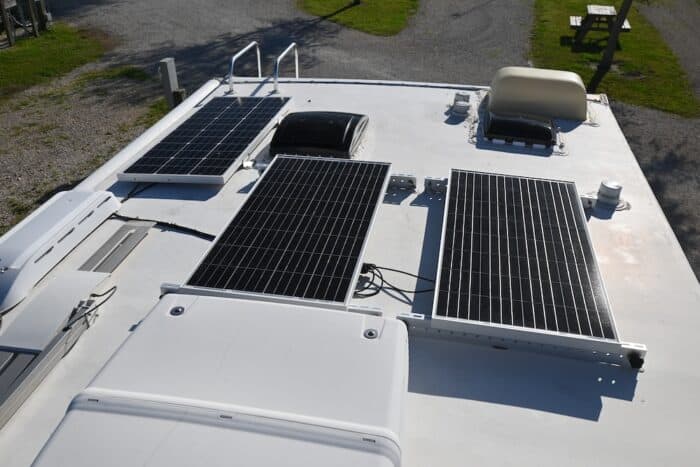
Below are some of my recommendations, all of these are compatible voltage- and amperage-wise with the Jackery Explorer power stations. Some are thin, flexible panels that are often used in permanent installations where you don’t want to add too much weight. They’re also great for stealthy setups.
All of them use MC4 connectors, which means you must also purchase the Solarenz MC4 to DC adapter (click to view on Amazon), unless stated otherwise. According to the description, it comes with a DC7909 to DC8020 adapter as well.
- SunPower 50W Flexible – A lightweight and waterproof little panel.
- Newpowa 75W – An efficient rigid 75W panel.
- Lensunsolar 80W Flexible – This company makes panels in a lot of different sizes. This 80W panel is a lightweight and waterproof option.
- Newpowa 100W Flexible – A popular 100W flexible panel, lightweight and waterproof.
- Renogy 100W – Possibly the most popular 100W panel there is. I have four of these on top of my camper. Reliable, waterproof, and easy to mount.
- Newpowa 9BB 120W 24V – A 24V panel that is available in different sizes. Don’t connect two of these in series, but parallel is fine. Great choice if you want two panels connected in parallel. You could even have four of them, two pairs of two, and use both input ports. Not compatible with the 100 or 300 Plus.
- Renogy 175W Flexible – A high-quality flexible 175W panel, great for stealthy setups that require a lot of power.
- Renogy 200W – A large rigid 200W panel by Renogy. Great if you’re looking to maximize the input. Three of these in series connected to both input ports would be 1200W total.
- Eco-Baeerss 300W – A massive panel from a relatively new brand. It’s a 12V panel, so you should be able to connect up to three in series.
Combining Panels
Combining two or more panels is a great way to increase the charging speed.
You should only combine two of the same panels. It’s possible to combine different sized panels for one of the input ports, but it’s not recommended because it will not be efficient.
There are two main ways to combine two or more panels, with a parallel and a series connection.
Parallel
A parallel connection adds the amperages together but keeps the voltage the same, a series connection does the opposite, meaning it adds the voltages together but keeps the amperage the same.
Because of the 60V, 12A max input rating per port on most if not all Pro and Plus power stations, you should combine parallel and series if you have four panels or more.
Combining two panels in parallel is done with a MC4 Y branch, like this one by Linkpal (click to view on Amazon). It’s for combining two panels that use MC4 connectors.
You can find larger Y branch adapters for combining three or four panels as well, but the 12A max input will be reached by two 100W panels, and it’s not worth exceeding that unless your parents aren’t close to the 12A limit.
There are adapters that are made for combining 8mm connectors, like this one by Paekq (click to view on Amazon), but I haven’t used it myself so I don’t know how reliable they are. If you have two panels that are the same I would connect them separately to the two input ports instead. Depending on your setup, you might want to try the 8mm splitter though.
Series
A series connection does usually not require any extra adapters, since you just need to grab the positive connector from one panel and connect it to the negative connector on the second panel.
It’s easy and straightforward to do with solar panels that use MC4 connectors. You just need to remember that doing this is going to increase the total working voltage, and you need to stay within the 17-60V range.
One 100W 12V panel will have a working voltage of around 18-20V, so you shouldn’t connect more than three of those in series.
Check the specifications of your specific panel and combine the working voltage of all of them to make sure it ends up being below 60V.
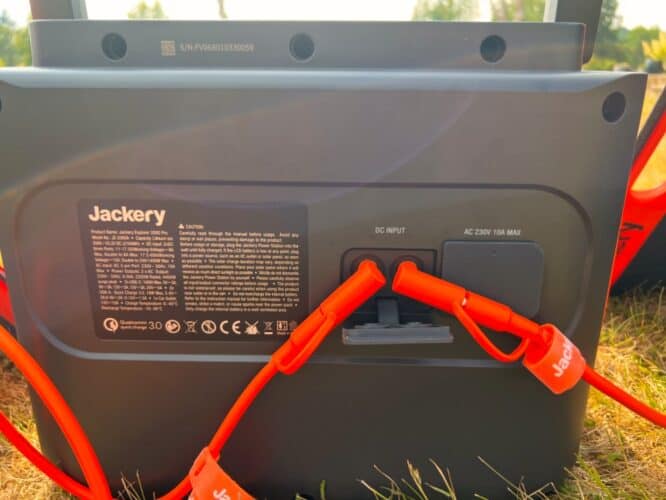
Extension Cables
If your panels have MC4 connectors, I recommend the Geosiry MC4 extension cables (click to view on Amazon). They come in different lengths and sizes. I recommend 10 AWG because it can handle more amps than 12 AWG. This one can handle at least 30A.
It’s a bit trickier to find an 8mm extension cable that can handle a high amperage. If your panel isn’t larger than 200W, I recommend this iGreely 8mm extension cable (click to view on Amazon).
It comes in different lengths and includes an adapter to make it compatible with Jackery power stations. I think you still need to use the DC7909 to DC8020 Jackery provides.
A 14 AWG cable can handle up to 15A, which is why it shouldn’t be used for setups larger than 200W. According to Greeley, the cable can handle up to 300V so you can technically connect two 200W panels in series and use the iGreely extension cable. The amperage will then be below 15A, while the voltage doubles.
How Do I Reach 1400W Solar Input?
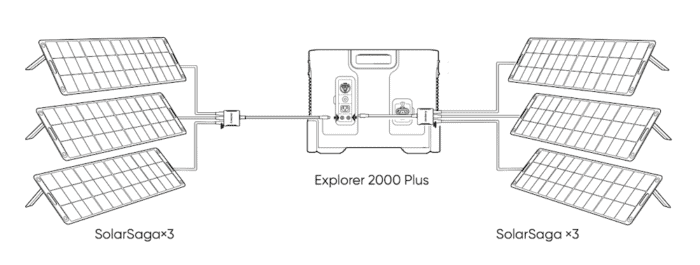
To get to the advertised 1400W max solar input, you must have 12A at 60V going into both input ports, since 24*60=1440.
With two pairs of three 200W panels, you should get to 1200W input, as seen in the illustration below from the Explorer Pro and Plus manuals.
What can I do to improve the charging speed further?
If you have bought as many solar panels as you have space for, it’s going to be all about giving them the best possible conditions.
This means making sure that there is not even a little bit of shade on them and that they’re clean.
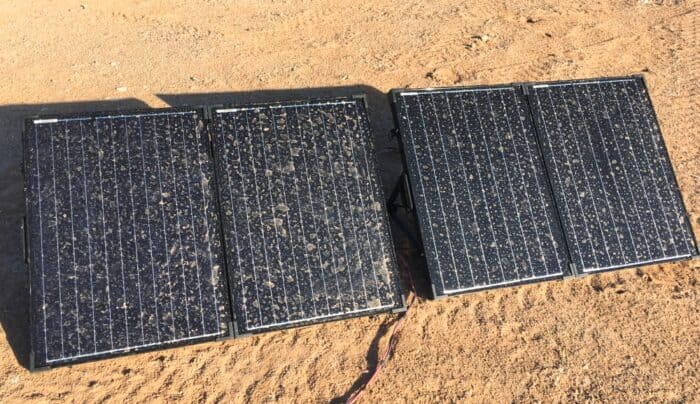
But the biggest difference you can make is to make sure they’re angled directly towards the sun. That can increase their output significantly. This is especially important when the sun is low on the horizon, like during winter months or in the morning and the evening.
What are some useful accessories for connecting panels to power stations?
I think a multimeter like this one by AstroAI (click to view on Amazon) is really helpful. It makes it easy to check the voltage and amperage of connections. Great for checking polarity. It also helps you understand how solar panels react to sunshine and shade. Last but not least it’s a great way to troubleshoot connections.
I also use a high precision watt meter, like this one by Yunsailing (click to view on Amazon). It comes with bare wires, so I have connected MC4 connectors to mine. Here is an MC4 kit by BougeRV if you would like to do the same. Installing MC4 connectors on wire is relatively easy, and there are some great YouTube videos on how it’s done.
I connect it between the solar panel and the power station, and it shows both the current voltage, amperage, and watts. Just like the multimeter, it’s a great way to see what your panels are doing and if there is a problem.
Does connecting third party panels void the warranty for my power station?
That’s something I can’t answer, and I recommend reaching out to Jackery to get an answer to that.
Please leave a comment if you have questions.


