Can I Connect a Solar Panel Directly to an RV Battery?
Solar power has taken over the RV world. It’s hard to find an RV that doesn’t have at least one small solar panel mounted to the roof or sitting outside.
If you dry camp, having a solar panel connected to the RV battery is a really simple way to keep the batteries charged so you can run the basic necessities like lights, the water pump, and the fridge.
Related Product: We use the reliable VMAX 100Ah AGM battery (click to view on Amazon) in our RV.
The more power you use the more solar panels and battery storage you are going to need.
In this article, I will outline the simplest way to get solar power to your RV battery.
This isn’t a guide for large RV battery banks with inverters connected to them. This is more for the average camper who wants a panel that can keep one or two RV batteries charged.
When solar panels for RV batteries first came out they were very small, up to 5 watts. They could be connected directly to the battery because they weren’t outputting much power. Much like a trickle charger.
The larger solar panels that are being used today require solar charge controllers between the panel and the battery.
The charge controller is basically a smart charger that regulates the power from the solar panel.
It makes sure the batteries are being charged safely and it will even turn off the power when the batteries are full so you don’t have to physically disconnect the panel from the battery.
See Also: Best Portable Solar Panel Charger For RV Camper/Boondocking
Charging RV Batteries with a Solar Panel
I recommend having at least one 100 watt solar panel for charging RV batteries.
It’s a practical size that should be enough to keep the batteries charged for running the basic 12 volt appliances in a camper.
The good news is that with this setup you can easily add another panel if you end up needing more solar power.
There are lots of different ways to connect a solar panel to an RV battery. You can get as complicated as you want with it.
My setup is meant to keep things as simple as possible. It’s the most direct way to run cables from a roof mounted solar panel to RV batteries.
This was done on a travel trailer that had the batteries stored on the front in battery boxes.
It might be a little different for 5th-wheels and motorhomes that usually have the batteries stored in a compartment instead of out in the open.
The concept is the same though, and figuring out where to mount the charge controller and where to run the wires will be the most difficult part.
One thing that has to be done is the solar charge controller needs to be protected from the elements.
That means you need to keep it in a watertight box like we did, or it needs to be mounted inside a storage compartment.
When we switched to a motorhome we were able to mount the solar charge controller inside because there was a hole already drilled into the floor that had cables running directly to the RV battery compartment.
It will be a little different for everyone, but here’s our simple way to connect a solar panel to RV batteries.
See Also: How To Replace A Non-Powered RV Roof Vent With A Powered Fan
List of Parts
Here’s a list of everything we used for this solar panel setup.
Products Used
(click links to view on Amazon)
- Renogy 12 Volt 100 Watt Solar Panel
- Renogy Voyager 20A 12V/24V PWM Solar Charge Controller
- Renogy 20A Fuse Block
- Renogy Solar Panel Mounting Z Brackets
- Roofing Screws with Rubber Washers
- 10AWG Solar Extension Cable w/ MC4 Connectors
- 10AWG Battery to Charge Controller Cables
- Cable Tubing (for protecting solar cables that are exposed to the road)
- EternaBond RV Roof Seal
- Butyl Tape
- Self Leveling Lap Sealant (can be substituted with EternaBond)
- Caulk/Sealant (for sealing holes made for solar charger cables, you can also use EternaBond tape in certain cases)
- Weather & Dust Proof Box (not necessary if you’re planning on mounting the charge controller inside a protected area like a storage compartment)
Tools Used
- Drill
- Caulk Gun (if using self leveling lap sealant instead of EternaBond Tape to seal roof screws)
- Philips Screw Driver
- Wire Stripper
- Box Cutter
- Saw (for cutting the handles of the battery boxes so the charge controller box would fit.)
Other Optional Products
We bought everything we used in separate parts, but Renogy also makes a solar charger kit (click to view on Amazon).
This kit includes a 100 watt solar panel, roof mounting brackets, 30 foot solar extension cables, 8 foot solar charger to battery cables, and a 30A charge controller.
The included charge controller is just a slightly larger version than the 20 amp one we used. It also has a Bluetooth feature that makes it so you can see your battery levels and the solar input from your phone.
Both Voyager models are compatible with all battery types, including Lithium and SLA batteries.
This kit does not come with a fuse. If you want to use one you will need to purchase one separately.
If you want to be able to angle your solar panels to follow the sun you can get this Renogy roof mounting kit (click to view on Amazon).
It has foldable legs you can use to tilt up the solar panel. It can also be folded down so it lays flat on the RV roof for travel.
See Also: What Are The Best Thin Solar Panels For Stealth Camping?
Steps for Installing a Solar Panel onto an RV Roof
1. Find a Good Spot on the RV Roof
When deciding where you should install the solar panel on your RV roof there are a few things you will need to consider.
First, where are the RV batteries and where will the solar charge controller be?
You want to put the panel on the part of the roof that’s closest to where the cables will need to go.
In the case of our travel trailer that was the front of the RV since the batteries and the charge controller were located on the tongue.
You also want to think about the other things on the RV roof. If you put the panel right next to the RV AC it might block the sun.
Putting the panel in a spot where it will get the most sun for as long as possible is important.
If possible you also want to be able to find where the roof supports are so you can screw the solar panel into a solid spot.
We found that finding the roof studs was harder than we thought it would be. The stud finder didn’t work because there are multiple layers of rubber and wood on an RV roof.
We did the best we could and so far we haven’t had any issues with the solar panel staying on the roof.
Since both roofing screws and butyl tape was used to mount the panel a lot is keeping it in place.
2. Attach the Roof Mount Brackets and Butyl Tape
Once you have a general idea of where to put the solar panel on the RV roof you can attach the mounting brackets to the panel.
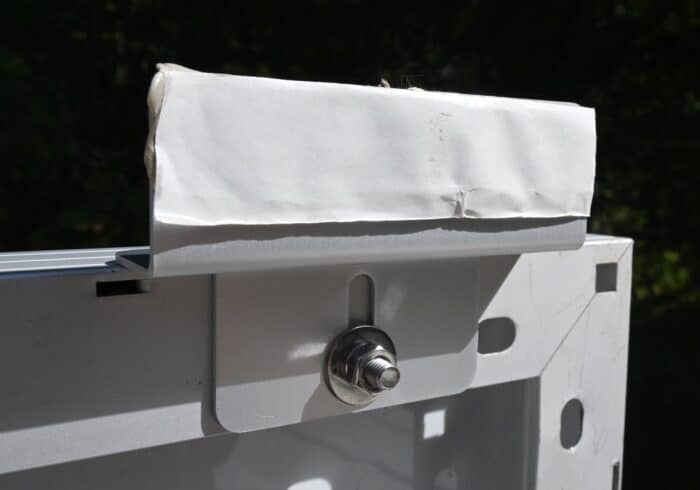
Put a piece of butyl tape on the bottom of every bracket. It’s important to use sealant tape when putting anything on an RV roof.
It not only seals the roof and keeps water out but it also acts as an adhesive and helps keep the panel mounted securely to the RV roof.
3. Connect the Solar Extension Cables
You will be able to connect the solar extension cables at any time using the MC4 connectors but it’s easier to do it before the panel is secured to the roof.
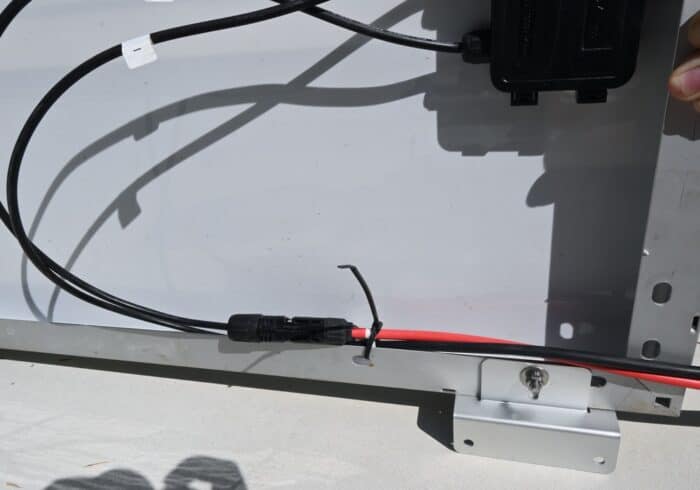
I zip tied the cables underneath the solar panel so they would stay in place.
That way there won’t be any pressure put on the connection box under the solar panel and the MC4 connectors will always be protected underneath the panel.
See Also: RV Rubber Roof Repair: When to Repair, Reseal or Replace
4. Screw the Solar Panel onto the RV Roof
You can also skip this step and do it last.
Use roofing screws with rubber washers (click to view on Amazon) to secure the panel to the RV roof.
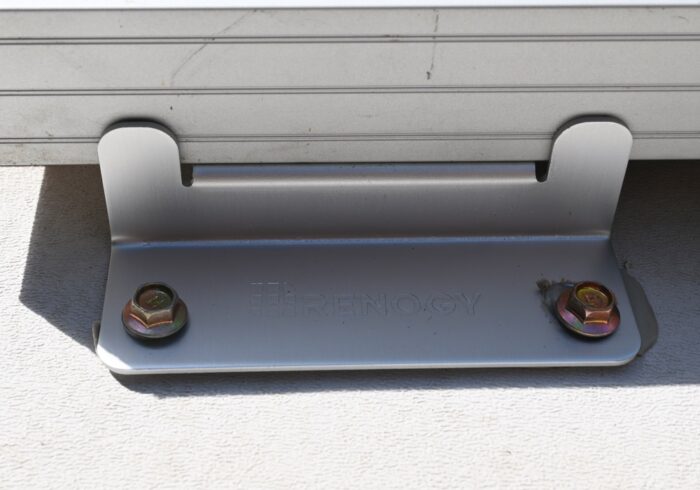
In the picture above you can see the butyl tape that’s between the bracket and the RV roof. It’s spreading out and sealing the holes being made in the RV roof by the screws.
Even though everything should be nice and sealed up because of the butyl tape and the rubber washers it’s still highly recommended to use a second sealant on the top of the roofing screws.
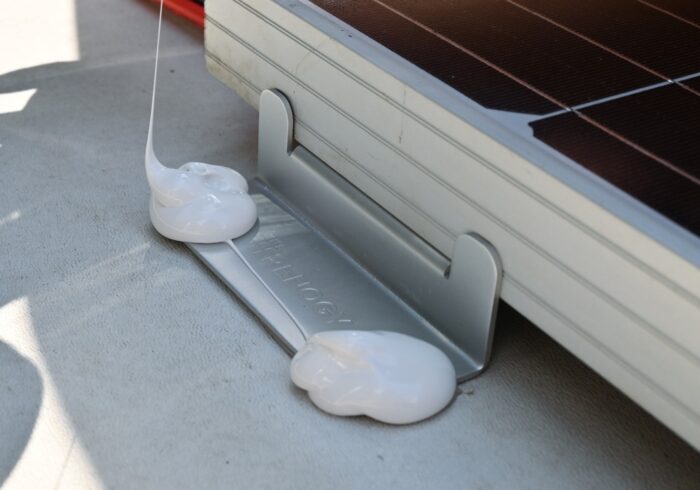
We used self leveling lap sealant but since doing this project I’ve started using EternaBond tape.
Since you should already have Eternabond tape I recommend cutting off a strip and covering the entire foot of the bracket, including the heads of the screws.
But you can also use self leveling lap sealant like we did.
Now the 100 watt solar panel should be fully installed on the roof of your RV.
It’s time to set up the extension cables and the solar charge controller.
Installing & Connecting the Solar Charge Controller
1. Run Solar Extension Cables to the Charge Controller
We wanted to make this installation as simple as possible. So instead of finding a way to get the solar extension cables to the charge controller inside of the walls, we ran the cables down the outside front of the travel trailer.
I used some PVC cable hiders on the roof to not only secure the solar cables but to also help protect them from the sun.
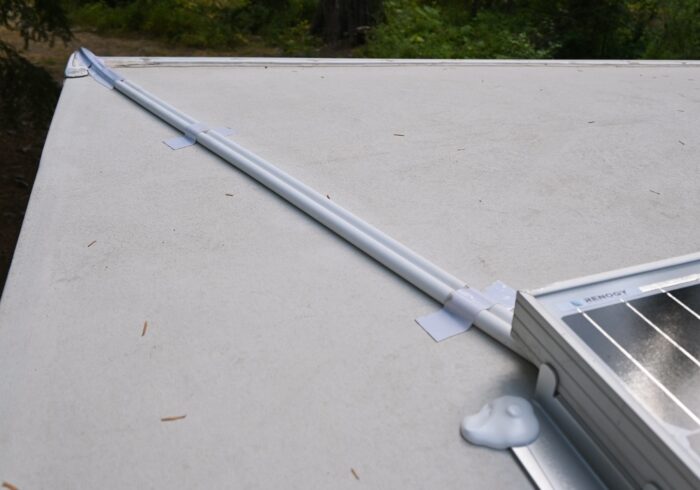
After doing this installation I’ve since decided that using EternaBond tape to secure and protect the cables would have worked even better.
EternaBond is not only extremely good at sticking to everything, but it also has a special outer layer that is resistant to the sun and more durable than plastic and PVC.
I also used PVC cable hiders for the cables going down the front of the travel trailer.
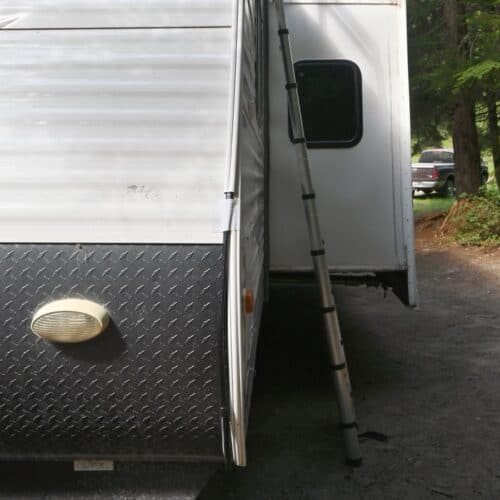
Once again EternaBond is a fantastic and more durable alternative to PVC cable hiders, but the downside is it’s much harder to remove.
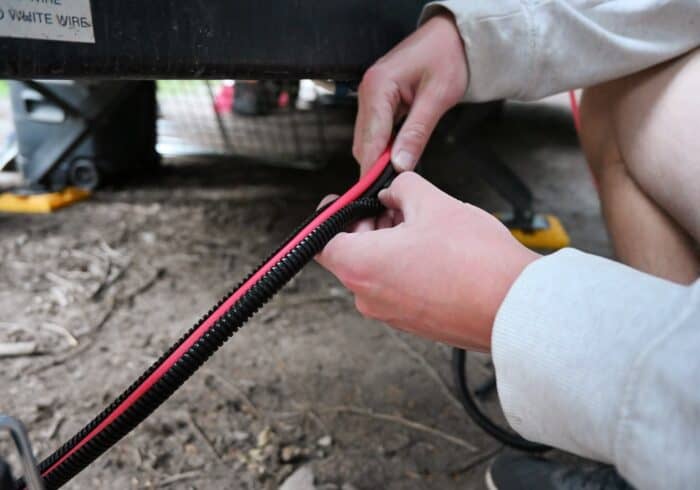
For the bottom half of the camper, I switched to black cable tubing to protect the extension cables from the road.
I secured the cables and cable tubing to the bottom of the RV where the plywood floor was accessible. I was able to use a cable clamp (click to view on Amazon) and a regular screw.
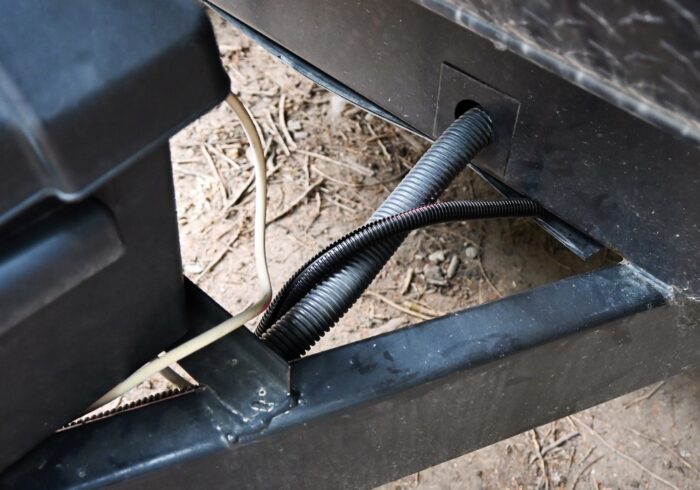
Since the charge controller is going to be mounted between the RV batteries we were able to secure the extension cables from the solar panel to the 12 volt power cables.
See Also: Best Portable Power Station/Solar Generator For Camping
Connect the Charge Controller (Electrical Box Method)
If you don’t mind drilling a hole large enough for the solar cables to fit through in the floor of your RV you can install the charge controller inside the front outer storage compartment.
It’s a good spot for a charge controller because it’s watertight and it will be easy to check the charge controller whenever you want.
We didn’t want to drill any holes in the floor of our travel trailer because we wanted our setup to be easy to remove.
Instead, we mounted the charge controller in a waterproof PVC electrical box that fit perfectly between the two RV batteries.
If you want to mount the charge controller inside your RV or a storage compartment the way the cables are set up will basically be the same.
You will need longer cables for the controller to battery connection.
1. Prep Battery Cables
You need to be able to connect the cables from both the battery and solar panel to the charge controller before mounting it.
Use 10 AWG cables with battery lugs on one end and open wires on the other.
Since the charge controller is mounted right next to the batteries we didn’t need very long battery cables.
If you mount the charge controller further away you will need to get longer cables to reach.
Not everybody uses fuses but it’s recommended to have a fuse between the battery and charge controller.
We used a Renogy 20A Fuse Block (click to view on Amazon) but any 20 amp inline fuse works.
We chose the fuse size based on the amps the cables can handle.
Put the fuse on the positive cable that will be between the battery and the charge controller.
We installed the fuse so it could sit inside the electrical box with the charge controller so it would be protected.
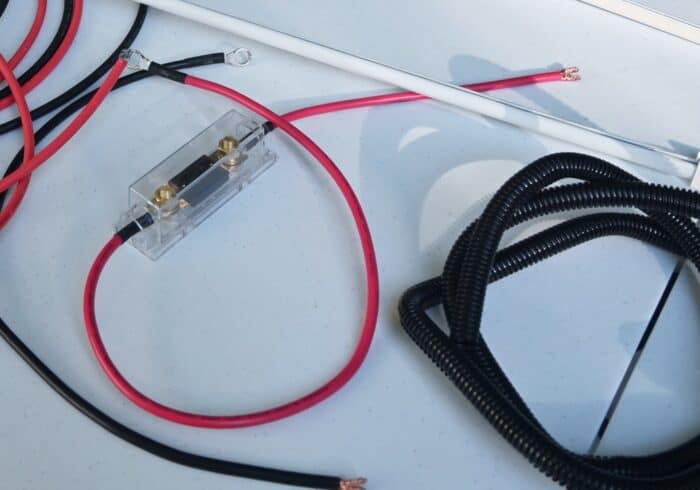
2. Connect All Cables to the Charge Controller
After you set up the cables that connect the batteries and make sure they can reach you can connect them to the proper terminals on the solar charge controller.
Make sure you thread the cables through the electrical box first.
We drilled two 1/2″ holes in the electrical box that could fit 2 cables each. We used 2 small holes instead of a big one so there would be less space to seal with caulk.
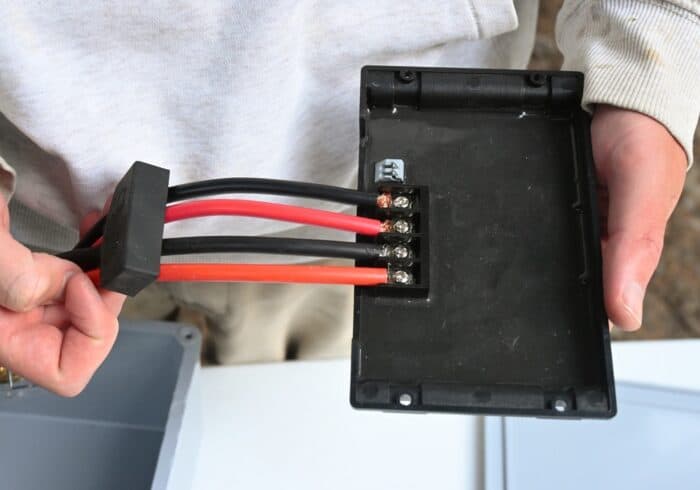
3. Mount the Charge Controller Inside the Electrical Box
Use small screws to mount the charge controller inside the electrical box.
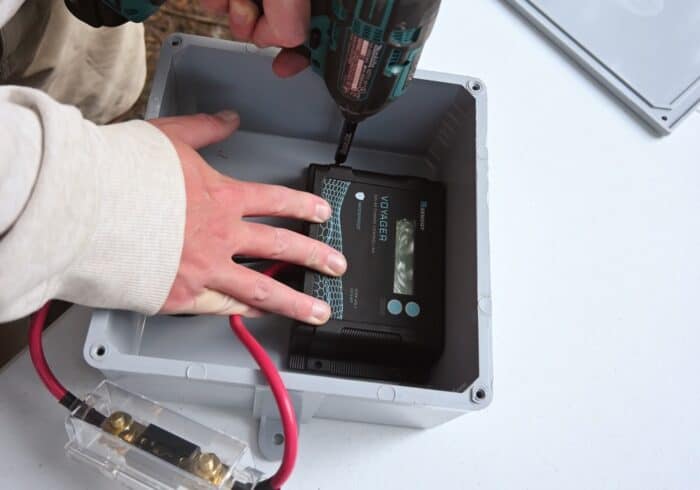
The end result should have the charge controller and the 20 amp fuse inside the box.
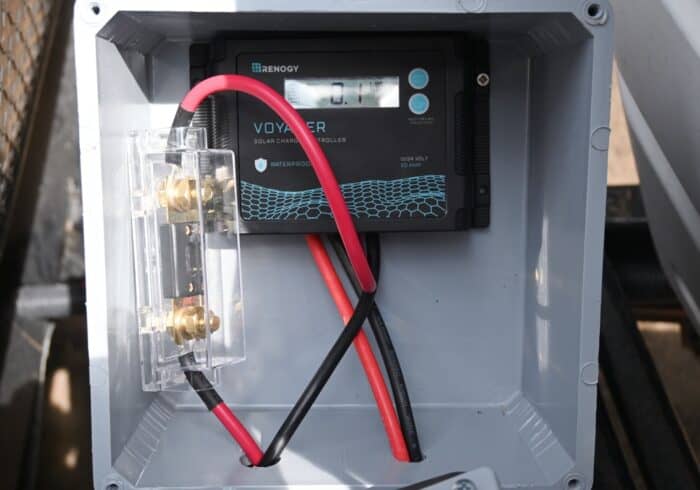
Use caulk or EternaBond tape to seal the holes in the bottom of the electrical box so no water can get inside.
4. Secure the Charge Controller Box.
There was just enough space for the electrical box to fit between the two RV batteries after we sawed off the inside plastic handles on the battery boxes to give the electrical box enough space to fit.
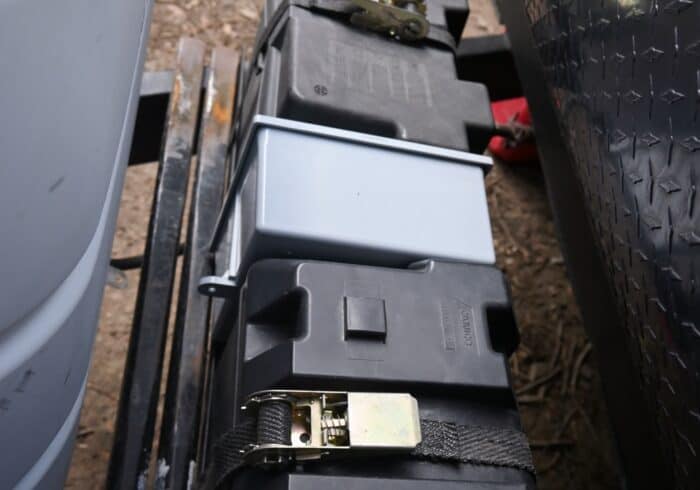
The battery and solar panel cables come out of the bottom of the box.
Connect the cables with the battery lugs on them to the same battery terminals the RV cables are connected to.
You want to charge the RV batteries from the same terminals power is being drawn.
Our travel trailer is powered using two 12 volt deep cycle batteries connected in parallel.
That means the positive cable from the charge controller will be connected to one battery and the negative to another.
5. Adjust the Charge Controller for Your RV Batteries
Most advanced charge controllers, like the Renogy Voyager 20A 12V/24V PWM Solar Charge Controller (click to view on Amazon), can charge most kinds of batteries.
But the different battery types will have different settings for optimal charging.
Follow the instructions for your specific charge controller to match the kind of batteries you have connected to it.
See Also: How We Store & Transfer Extra Water To Our RV When Camping
Routinely Check the Charge Controller & Solar Panel
If everything was set up correctly and the connections were done right the solar panel should be able to charge the RV batteries without you needing to do anything else.
But to be safe I recommend checking the charge controller routinely to make sure it’s set correctly, charging the RV batteries, and still being protected by the electrical box.
Also, check the solar panel now and again to make sure it’s still secured tightly to the RV roof and clean.
Have any questions about installing a solar panel to charge the RV batteries? Leave a comment below.


hello! I would like to know what you think about the flexible panels that are glued directly to the roof of vans and motorhomes, best regards
Hi,
They are great if you use high-quality panels that can handle extreme temperatures without burning. A lot of the cheaper models aren’t made with materials that can handle the heat while being glued to a surface.
I’ve been told to only use flexible panels with an ETFE layer, so if you’re the one buying the panels make sure it has that.
great, thank you very much, I am deciding whether to put a roof rack with a rigid solar panel or a flexible one and I can’t decide, in Spain it can be very hot at noon, I only have to buy a 200 w solar panel, so it will be the best quality you can find
Excellent article. Very simple. Exactly what I was looking for. My question is, can you use the power directly from the solar panels instead of just batteries? Does the charge controller switch between the batts and panel power? Thanks in advance.
Hi,
Unfortunately, I don’t think there is a solar charge controller that can do that.
Its job is to regulate the voltage from the panel and charge the battery safely. It can’t regulate the voltage and supply a steady 12V to an RV for example, and charge controllers don’t work without a battery.
It is possible to power some 12V electronics directly with a solar panel with the use of a step down converter, but that’s not something that should be connected to an electrical system in an RV.