
This post is for entertainment purposes only. We are not electricians and you should get professional help if you don’t know what you’re doing. We are not responsible for any damage.
Why Should I Remove My RV AC?
If you’re a boondocker like we are you may have noticed that you don’t use your RV AC very often, if at all.
After a year of full-timing, we ran the RV AC maybe one time and only when we happened to be staying in an RV park for a night when passing through a city on our way to a boondocking campsite.
RV AC units can be nice if you are hooked up to 30 or 50 amp power or have a large generator but if you are just a regular dry camper chances are you won’t ever use it.
Related Product: We level our RV with the innovative Andersen RV Leveling System (click to view on Amazon)
Removing your RV AC means there will be less wind resistance on the top of your RV or trailer. An RV AC unit weighs more than you think and getting that extra weight off can be nice as well.
If you have an RV that’s a few years old like ours you probably don’t have a vent or skylight in the main room.
This is the case with our 2013 Heartland Prowler. There are lots of windows and a skylight in the bedroom but there was no way for good natural light to get into the main living/working area.
The windows are all tinted which means they don’t let in a lot of light. We really noticed how dark it was in our travel trailer when we spent our first winter down south.
We realized that if we added a skylight, vent, or fan a lot of natural light would be let into the trailer.
See Also: How To Install Solar Panel On RV Roof & Connect To Battery
Now that we’ve replaced our RV AC with a 12V fan with a white vent lid (click to view on Amazon) I can tell you for sure that it really does help bring in some good light.
In this article, I’m going to go through how we removed our RV AC and added a 12V fan step by step.
You can take this information and add a skylight (click to view on Amazon) or even a Maxxair Fan (click to view on Amazon).
Keep in mind that we are not professionals and any work you do on your RV is at your own risk.
How To Remove An RV Air Conditioner Unit
Removing an RV AC unit is fairly simple and requires very few tools. The most difficult part is going to be finding a safe way to get the RV AC from the roof to the ground.
They can weigh around 100 lbs. If you’re saving your AC for later or going to sell it, you want to be careful when transporting it.
I’ll talk about ways to get your RV AC off the roof later in this section.
1. Disconnect All Electrical
An RV AC is connected to both 120V and 12V power. Disconnect your RV from any outside power source and the RV batteries.
It might sound like overkill but you will be working with bare electrical wires and you can never be too careful.
2. Remove Inside Cover
The first thing you are going to take off is the plastic cover on the inside of your RV.
It doesn’t matter if you have a ducted or non-ducted RV AC unit. The inside cover will be removed by undoing the 4 screws on the corner.

There may also be another couple of screws on the inside of the cover. You can normally access these by removing the small plastic door on the cover.
Inside you will see a few screws that are holding the cover on from the inside. Once removed the entire cover should come off.
See Also: How To Replace A Non-Powered RV Roof Vent With A Powered Fan
3. Take Care Of Electrical Wiring
The RV AC unit is connected to the RV electrical system through an electrical box.
If you’re lucky you will be able to unbolt the entire box so you can bring the entire thing outside of the RV AC without having to remove the main AC cover on the outside.

There are a few things you want to be careful of here.
The RV AC might be connected to your RV thermostat which is also connected to the furnace.
We learned the hard way that if you undo certain wires it will stop the furnace from working. The wiring of your camper might be different though.
See Also: Best RV Roof Coatings That Seal & Protect (All Camper Roofs)
If you look at the picture above you will see the large yellow cable going into the black box on the very left.
Disconnect them from the black box and cover the bare wires with electrical nuts and electrical tape.

You can remove the large white plug and all of the small wires shown in the picture above. Remember to label where wires go in case you want to reinstall your RV AC unit later.
If you are installing a regular vent or a skylight you can simply cover these wires in electrical tape and tuck them to the side.
If you are installing a 12V fan like a Maxxair you are going to need to mess with these wires a little bit more later on. For now, you can just leave them tucked to the side.
4. Remove The Mounting Bolts
Once the electrical from the AC unit is unhooked you are ready to remove the last 4 bolts that are securing the entire AC unit to the RV.
They are the black bolts on the corners of the metal frame. You will unscrew them from the inside.

These bolts are really long and once they are removed the metal frame will fall down and the RV AC unit is ready to be removed.
5. Take Of RV AC
To remove the RV AC unit, push on it from the inside or lift it from the roof. It should come right off.
There is no caulk or sealant you have to worry about and if you got all the wiring disconnected correctly it will lift right off.

The center thing you see in the picture is just a foam piece that you can pull out.
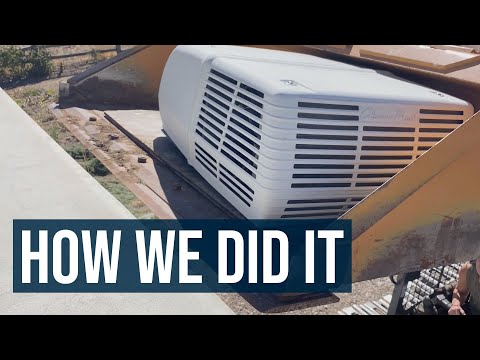
6. Get The RV AC From Roof To Ground
As I said before the tricky part of RV AC removal is getting the unit safely to the ground.
I’ve seen people do this several ways. We were able to use a skid-steer loader to get ours down.
I put the bucket next to the trailer roof and we carefully slid the RV AC unit onto the bucket. I then lowered it carefully to the ground.
See Also: RV Rubber Roof Repair: When to Repair, Reseal or Replace

Not everyone has a skid-steer around and you may have to get creative.
If you can park your RV under a roof with open beams you can use a rope pulley system to get it down. I’ve also seen people use 2×4’s to make a ramp to slide the AC unit down to the ground.
Whichever way you do it make sure you are careful and don’t ever stand directly under the RV AC.
How To Measure For An RV Vent, 12V Fan, Or Skylight
It came as a surprise to me to find that the hole in the roof for the RV AC unit was actually the standard 14×14 inch hole that almost all RVs have for vents and fans.
That means most standard vents, skylights, and fans are going to be an easy fit with no cutting required.
You should still measure the opening to make sure but so long as the hole measures around 14×14 inches most RV roof products should fit.
See Also: How To Replace The Leaf Springs On A Dual Axle Trailer
The only thing you may have trouble finding is a proper “garnish ring” that is the correct length to fit the thickness of your RV, travel trailer, 5th-wheel, or van roof.
The garnish ring is the plastic ring that fits around the vent, fan, or skylight from the inside.
It covers the open wood from the roof and makes the inside look finished and nice.

Since the RV AC unit in our travel trailer was located in the center of the roof the distance between the top of the roof and the ceiling of our RV from the inside was thicker than normal.

Most standard RV vents, fans, or skylights come with a 2 1/2 inch garnish ring, but our roof thickness required a 6 inch garnish ring.
When measuring the roof thickness it’s easiest to do it from the inside.
When you remove the inside cover from your RV AC you will be able to see the entire roof thickness and measure it so you can get the correct parts before taking everything apart.
When ordering a part with a garnish ring it’s ok to get a garnish ring that is longer but not shorter.
In fact, the Maxxair fan actually comes with an extra long garnish ring you are supposed to cut into the correct roof shape.
See Also: 4 Easy Ways To Add Stabilization To An RV, Trailer, Or Van
We were on a budget and weren’t able to get a Maxxair fan.
Instead, we got an affordable 12V fan/RV vent (click to view on Amazon) and a 6 inch garnish ring (click to view on Amazon).
It fit perfectly and has been working great these past few months we’ve been using it.
To install a skylight (click to view on Amazon), you’ll need to get a garnish ring (click to view on Amazon) as well.
If you replace your RV AC with a Fan-Tastic fan (click to view on Amazon) it comes with a thick garnish ring. Which means you won’t need to buy one separate unless you have an unusually thick roof.
How To Install An RV Vent, 12V Fan, Or Skylight
Now that you know what RV vent, 12V fan, or skylight you are going to need to cover the hole left from the RV AC you are almost ready to install it.
Other Products You Will Need
Besides the RV vent, 12V fan, or skylight and the correct size of garnish ring, you will need a few more things for a proper install. These things include:
1. Put Vent, 12V, Or Skylight Over The Hole
Clean off any dirt or putty around the hole on the outside. There shouldn’t be any putty, but if there is, remove it so you have a clean flat surface to work with.
There was just a bunch of dirt around the RV AC hole on our travel trailer. I just used a rag and soapy water to clean it.
See Also: Best Portable Power Station/Solar Generator For Camping
You can now place whatever you are going to use to cover the RV AC hole on the roof.
At this point, I put the putty tape (click to view on Amazon) around the 12V fans inside edges so I wouldn’t have to do it later.

When putting on putty tape you want to make sure all the screw holes are covered and the edges of the putty tape overlap in the corners so there will be no gaps.
The putty tape is one of the best ways to waterproof your RV roof and you don’t want spaces for water to seep in.
You will also put lap sealant around the outside edges but that comes later.
2. Take Care Of The Wires
If you are installing an RV vent (click to view on Amazon) or a skylight (click to view on Amazon), you won’t need to worry about any of the electrical parts.
Simply take the electrical wires sticking out of the roof from the RV AC unit and cover them with and electrical tape.
Make sure no bare wires are showing, and push them to the side.
If you are installing a Fan-Tastic fan (click to view on Amazon) or a regular 12V RV Vent Fan (click to view on Amazon), things are going to be a little more tricky.
You don’t need to worry about the 120V power because you want the fan to be connected to the 12V so you can run it without having to be plugged into shore power.
Again, we are not electricians and you should get professional help if you don’t know how this works.

We wired it by connected the positive fan wire to the circuit that was the blue and white wire.
These wires were originally connected to the black box with a female blade connector. We had to cut off the female connector to wire the positive fan wire to it.
The negative fan wire will be connected to the orange and red wires.
These were not connected to the main black electrical box and it was easy to remove the electrical nut and add the negative fan wire to it.
See Also: Is Your RV Fridge Not Cooling? Try This One Simple Trick
After you connect everything hook your batteries back up to your RV and try to turn on the fan.
It should come on without having to mess with anything on the thermostat. Also, make sure your furnace still works by flipping it on via the thermostat.
If it doesn’t come on then you have misswired something. Make sure you unhook any power before messing with the wires again.

You can use tape to secure all the leftover wires to the sides of the roof hole.
Our RV AC was ducted, so we were able to hide most of the wires inside the duct holes.
The garnish ring should give you about an inch on each side which should be enough space to fit the leftover wires from the AC.
3. Secure The Vent To The Roof
Now that the wires are either connected or placed to the side you can start screwing the vent, fan, or skylight to the roof of your RV.
If you are installing a vent you want the hinges to go towards the front of the RV or trailer.
Think of it this way, if the vent were open and you were driving you want the wind to blow the vent shut.
You also want to make sure it’s centered so the garnish ring will fit.
To do this have someone on the roof holding the vent in place and have someone inside the RV push the garnish ring into position.
On a vent or fan, the garnish ring will fit in the groove between the bug net and the outside of the vent.
If you are installing a skylight the garnish ring will just go to the edge of the roof.
See Also: Best Portable Foldable Solar Panel Chargers For Camping
Once you know the garnish ring will fit and the vent is centered you can start screwing on the vent from the roof. Start with the corners, then the center holes, and work your way out from there.
The grey putty tape may start bulging out once you have installed all of the screws.
This is a good sign that the putty tape is sealing the vent to the roof.
Some people like to cut off the extra putty tape that’s bulging out before putting on the self leveling lap sealant but it’s not going to be a big deal if you leave it.
4. Secure The Garnish Ring
Once the vent, fan, or skylight is secured to the roof you can now install the garnish ring from the inside.
If you are installing a Fan-Tastic fan follow the garnish ring instructions.
If you are installing a 12V fan, vent, or skylight, you should be able to put the garnish ring in place right away.
If it’s too long you can also cut the ring so it fits perfectly.
You secure the garnish ring with 4 screws around the lip. You can reuse the painted screws from the RV AC inside cover if you want.
5. Cover Outside With Lap Sealant
Now for the most important part of any RV roof installation, the sealant.
The number one mistake people make when installing things on the roof of their RV is they don’t use putty tape and they don’t use enough self leveling lap sealant (click to view on Amazon).

In the picture above you can see that I’ve laid about 2 inches of lap sealant so it covers all of the screws, most of the metal vent edge, and about a 1/2 inch of the roof.
This picture was taken right after I got done laying the lap sealant and after about 15 minutes it had spread out even more.
I used 2 tubes of lap sealant to cover the vent exactly how I wanted. In my opinion, you can never use enough of this stuff.
It’s rained a couple of times since we installed our 12V fan vent and we haven’t had any leaks so far.
6. Enjoy Your New Vent, Fan, Or Skylight
The install is now complete at this point and you should notice a huge difference in the amount of natural light coming into your RV.
We have really enjoyed having a small 12V fan/vent instead of an AC on our travel trailer.
Even though it’s small the fan moves a good amount of air inside the RV without using a ton of electricity.
See Also: Best 12 Volt RV Lithium Battery Reviews + How To Charge
We put our RV AC onto storage so we can reinstall it later if we want to but I don’t think we will any time soon.
Have any questions about replacing an RV AC with a vent, fan, or skylight? Leave a comment below.
Thanks for this post. Should save a lot of money by diy.
Thanks, you covered everything I wanted to know.